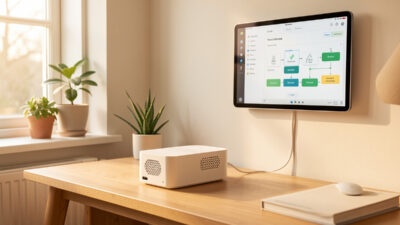
Home Assistant Blueprints: Reusable Automations Without the Copy-Paste
A Home Assistant blueprint is a reusable automation template with typed inputs: you write the logic once, then stamp out individual automations from it by filling in a form. I run a single motion-lighting blueprint across nine rooms in my setup, and when the logic needs a tweak I fix it in one place.
If you have ever copy-pasted the same automation YAML eight times and changed one entity ID per copy, blueprints are the cure. They are the difference between maintaining one automation and maintaining nine near-identical ones that quietly drift out of sync. This guide walks through what a blueprint actually is, how to import and use one, how the input selectors work, how to convert your own repeated automations into a blueprint, and the limits where I drop back to a raw automation or Node-RED.
What a blueprint actually is
A blueprint is a YAML automation with the entity-specific bits pulled out into named, typed input fields. The skeleton lives once; each automation you create from it supplies its own entities. Change the blueprint and every automation built on it inherits the change.
Mechanically, a blueprint file has two halves. The top is a blueprint: metadata block declaring name, domain: automation, and an input: map. The bottom is an ordinary trigger/condition/action body, except that anywhere you would normally hardcode an entity you instead write !input motion_sensor to pull the value from the form. That is the entire trick: the body references inputs, the inputs get filled per-automation, and Home Assistant keeps a link from each automation back to its source blueprint. When I edit the source, every child automation re-reads it.
This is fundamentally different from a script. A script is one callable routine; a blueprint is a factory that produces many independent automations. They do not run “through” the blueprint at execution time the way a script call routes through a shared script. Each stamped automation is its own entity with its own trace, its own enable toggle, its own state. The blueprint is just the mold.
Importing a community blueprint
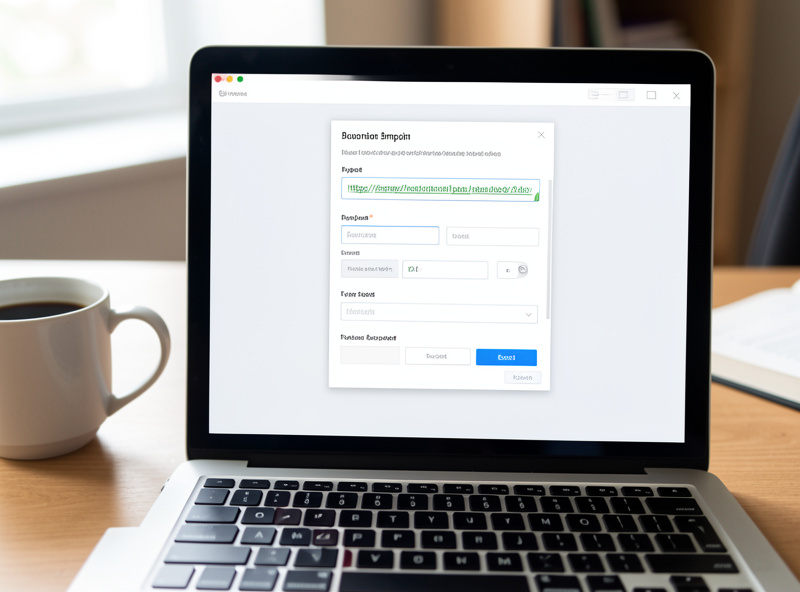
The fastest way to see blueprints work is to import one. In Home Assistant go to Settings, Automations and Scenes, then the Blueprints tab, and click Import Blueprint. You paste a URL, usually a GitHub raw link or a community forum post, and Home Assistant pulls the YAML in.
The community forum has a “My Home Assistant” import button on most blueprint posts that deep-links straight into your own instance with the URL pre-filled. That is the cleanest path: you click it on the forum, your browser hands off to your hub, and you confirm the import. The blueprint lands in config/blueprints/automation/<author>/ as a plain YAML file you can read and version-control. I keep my whole config in git, so every imported blueprint is right there in the repo, which matters when one breaks after an author updates it upstream.
Once imported, a blueprint does nothing on its own. It sits in the Blueprints tab as a template. To make it run you click “Create Automation” from it, fill in the inputs, and save. Now you have a real automation. You can stamp as many as you like from the same blueprint, and they are all linked back to it. Before I trust any imported blueprint I open the YAML and read it end to end, because an automation that controls my locks or heating is not something I run sight-unseen.
How inputs and selectors work
Inputs are the form fields, and selectors decide what each field looks like and what it will accept. A good blueprint uses the right selector for every input so the create form is impossible to fill in wrong, which is the whole point of the typed-input design.
Each entry under input: gets a name, an optional description, and a selector:. The selector is the powerful bit. An entity selector with a domain filter shows only matching entities, so a motion input filtered to binary_sensor with device_class: motion will only ever offer real motion sensors. A target selector lets the user pick entities, devices, or whole areas at once. There are selectors for numbers (rendered as a slider or box with min, max, and unit), for time durations, for booleans as a toggle, for a dropdown of fixed options, for text, and for picking an action or a scene.
Selectors are also where you set sane defaults. A motion-lighting blueprint should default the no-motion wait to something reasonable like two minutes, default the brightness to full, and mark the optional lux-sensor input as exactly that, optional, so rooms without a light sensor just skip it. Good defaults mean the create form is mostly pre-filled and you only touch the two or three fields that actually vary room to room. When I am designing inputs I think hard about which ones genuinely change per room and which can carry a default, because every extra required field is friction I will hit nine times.
Converting your own repeated automation into a blueprint
The real payoff is turning your own copy-pasted automations into a blueprint. The recipe is mechanical: take one working automation, identify every entity ID and tunable number that varies between copies, replace each with an !input, declare those inputs at the top, and you have a blueprint.
Start from an automation you already trust in production. Open it in YAML mode and copy the body. Then go through it line by line and ask of every hardcoded value: does this change between rooms? The motion sensor entity changes. The light target changes. The wait time might change. The lux threshold might change. Everything else, the trigger platform, the condition structure, the action sequence, stays identical across all copies, and that identical part is exactly what you want to maintain in one place.
Now invert it. For each varying value, add an input at the top with a descriptive name and the correct selector, then swap the hardcoded value in the body for !input that_name. Save the file into config/blueprints/automation/<you>/, reload blueprints from the YAML configuration menu, and it appears in the Blueprints tab. Create one automation from it, point it at a test room, and confirm the trace looks identical to the original. The first conversion takes longer than just copy-pasting once more, but it pays back the second time you need to change the logic. I keep my own blueprints in a personal folder in the same git repo as the rest of the config, so they version alongside everything else.
One thing that trips people up: !input is a YAML tag, not a template. You cannot do arithmetic on it inline in older patterns the way you might expect. If you need to compute with an input value you reference it inside a Jinja template with the !input handed in, which is the same pattern I use in my template sensors. For most motion-lighting and presence blueprints you never hit that wall, but it is the first real limitation you meet when blueprints get ambitious.
My real example: one motion-lighting blueprint, nine rooms
Here is the concrete win. I have one motion-lighting blueprint and nine automations stamped from it, one per room, hallway, kitchen, both bathrooms, the landing, the office, and so on. The logic is written once. When I improve it, all nine rooms get the improvement at once.
The blueprint takes a motion sensor input, a light target, a no-motion wait duration with a two-minute default, an optional lux sensor, and a lux threshold so lights only fire when the room is actually dark. The body is the usual pattern: trigger on motion detected, condition that lux is below the threshold if a lux sensor was provided, turn the light on, then wait for the motion sensor to clear plus the wait duration before turning it off. Nothing exotic. The value is not the cleverness of the automation, it is that there is exactly one copy of it.
The fix-once-propagate-everywhere moment came when I switched from PIR sensors to mmWave in a couple of rooms. PIR fires on movement and goes quiet when you sit still, so my old wait logic would kill the light while I was sitting reading. mmWave holds presence detection even when you are motionless, so the clearing behaviour is different. I changed how the blueprint waited for the sensor to clear, saved the one file, reloaded, and every room running mmWave behaved correctly immediately, with no re-editing of nine automations. If those had been nine copy-pasted automations, that is nine edits, nine chances to fat-finger an entity ID, and a near-certainty that two of them would silently drift apart. This is exactly the kind of repeated pattern the core automation examples hub points at as a candidate for a blueprint.
Per-room differences live entirely in the inputs. The downstairs bathroom has no lux sensor, so that input is left empty and the condition skips. The office wants a longer wait because I sit still at the desk. The hallway wants a short wait because nobody lingers there. None of that touches the logic. I open the automation, change the input value, save. The blueprint never moves.
Keeping inputs sane with helpers
Blueprints get fragile when you bake magic numbers into the inputs of every stamped automation. The fix is to point an input at a helper instead of a literal value, so you tune behaviour from one dashboard control without re-editing automations at all.
Say I want a single “house presence timeout” that several blueprints respect. I create a number helper for it, then in the blueprint I add an input with an entity selector filtered to input_number, and in the body I reference that helper’s state rather than a fixed duration. Now the timeout is one slider on a dashboard. Change it there and every automation respecting it updates live, no reload, no edit. This is the layer above blueprints: the blueprint factors out the logic, the helper factors out the tuning. Combining them is how I keep a large automation set maintainable instead of a pile of hardcoded constants scattered across nine YAML bodies.
Helpers also keep the create form honest. Instead of asking the person stamping the automation to remember the right number, you hand them a dropdown of the helpers you have already defined, and the selector enforces the type. It is the same instinct that makes good conditions readable: push the decision to a named thing rather than a bare literal buried in YAML.
Limitations and when to drop back
Blueprints are not a universal answer. They shine when you have many near-identical automations that differ only in entities and a few tunables. They get awkward the moment each instance needs genuinely different logic, and at that point I drop back to a raw automation or Node-RED without guilt.
The hard limits I hit in practice: blueprints cannot easily produce instances with different action structures, only different input values feeding the same structure. If room A needs to also notify my phone and room B needs to start a fan, that is two different bodies, not one blueprint with inputs. You can sometimes paper over this with optional inputs and conditions, but past two or three branches it becomes a tangle that is harder to read than just writing separate automations. Complex multi-branch flows with lots of state are where I reach for Node-RED instead, because the visual flow makes the branching obvious where blueprint YAML hides it.
The other limit is debugging. A stamped automation traces fine on its own, but when something is wrong with the shared logic you are debugging the blueprint through nine lenses, and a bad change propagates to all nine at once. That is the flip side of fix-once-propagate-everywhere: break-once-propagate-everywhere is just as real. I always test a blueprint change on one room first, watch the trace, and only then trust that the other eight behave. There is also a subtle reload gotcha worth knowing alongside restart behaviour: editing the blueprint file requires a blueprint reload before children pick it up, and the children themselves do not need re-saving.
One more honest caveat: a blueprint is only as good as its inputs are well-chosen. If you under-parameterise, you end up editing the blueprint for things that should have been inputs. If you over-parameterise, the create form becomes a wall of fields and you have just moved the copy-paste pain into form-filling. The sweet spot is the handful of values that genuinely vary, sane defaults on everything else, and helpers for anything you want to tune live. Get that right and a blueprint is the single best maintainability lever in Home Assistant. Get it wrong and you have built a more complicated way to copy-paste.
Frequently asked questions
What is a Home Assistant blueprint?
A blueprint is a reusable automation template with typed inputs. You write the trigger, condition, and action logic once, then stamp out individual automations from it by filling in a form. Editing the blueprint updates every automation built from it.
How do I import a blueprint into Home Assistant?
Go to Settings, Automations and Scenes, the Blueprints tab, and click Import Blueprint, then paste a GitHub raw or forum URL. Most community forum posts also offer a My Home Assistant button that deep-links the import straight into your instance.
What is the difference between a blueprint and a script?
A script is one callable routine that many things run through at execution time. A blueprint is a factory: it stamps out many independent automations, each its own entity with its own trace and toggle. The blueprint is just the mold, not part of the runtime.
Can I turn my own automation into a blueprint?
Yes. Take a working automation, identify every entity and tunable that varies between copies, replace each with an !input tag, and declare those inputs at the top with the right selector. Save it into your blueprints folder and reload to create automations from it.
When should I not use a blueprint?
Blueprints suit many near-identical automations differing only in entities and a few tunables. When each instance needs genuinely different action logic or heavy branching, drop back to a raw automation or Node-RED, where the differing structure is easier to read and maintain.