Outdoor Motion and Presence Sensor Automations
Outdoor motion and presence sensors are the engine of a smart yard: they detect movement or true presence and feed those events to your hub, which then decides what to do — turn on lights, send an alert, start recording, or run a scene. Done right, they trigger automations in well under a second, locally, without a cloud round-trip.
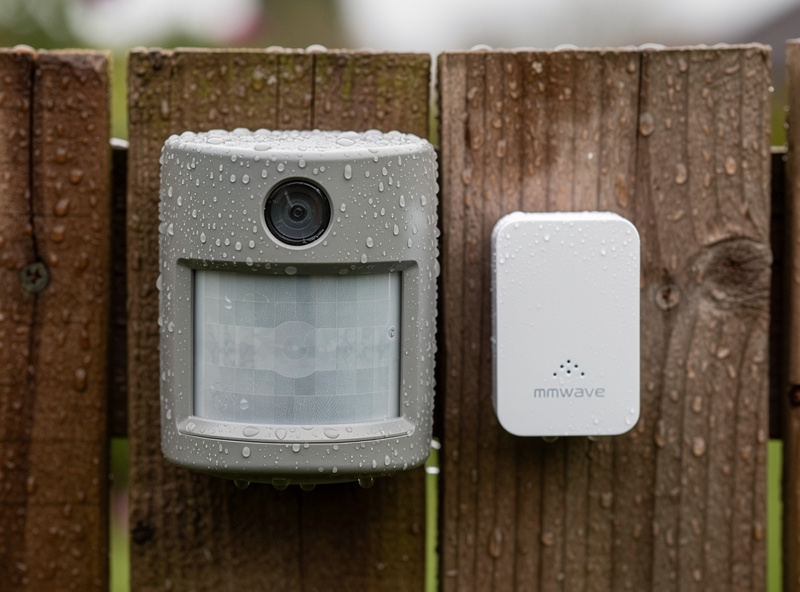
The distinction that trips people up is motion versus presence. A basic PIR sensor detects movement and then goes blind once you stop moving; an mmWave (millimeter-wave) presence sensor detects that someone is actually there, even standing still. Outdoors, where you want a porch light to stay on while someone fumbles for keys rather than clicking off because they paused, that difference matters. In my setup, I use cheap PIR for simple trigger zones and mmWave where genuine presence is the point. This guide covers both, plus how to wire them into reliable outdoor automations.
PIR vs mmWave Outdoors
PIR sensors detect heat movement and are cheap, battery-friendly, and fast, but they miss stationary people and can false-trigger on sun-warmed surfaces or pets. mmWave sensors detect actual presence and distance, hold a zone occupied while someone stands still, but cost more and draw more power. Match the sensor to the job.
For a driveway or path where you only care that something moved, PIR is perfect and a coin-cell lasts months. For a seating area or a porch where you want lights to stay up while people linger, mmWave is worth it because it won’t drop the zone the moment everyone stops walking. Outdoors, mmWave’s main caveat is that wind-blown vegetation and rain can occasionally register as motion, so I aim the detection zone away from a swaying hedge. The same PIR-versus-presence logic I apply indoors with motion-sensor lighting applies here, just with weatherproofing added on top.
Weatherproofing and Placement
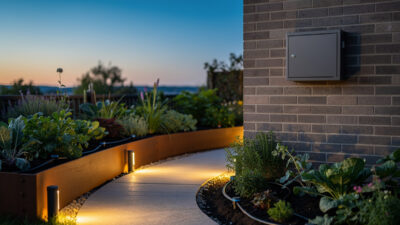
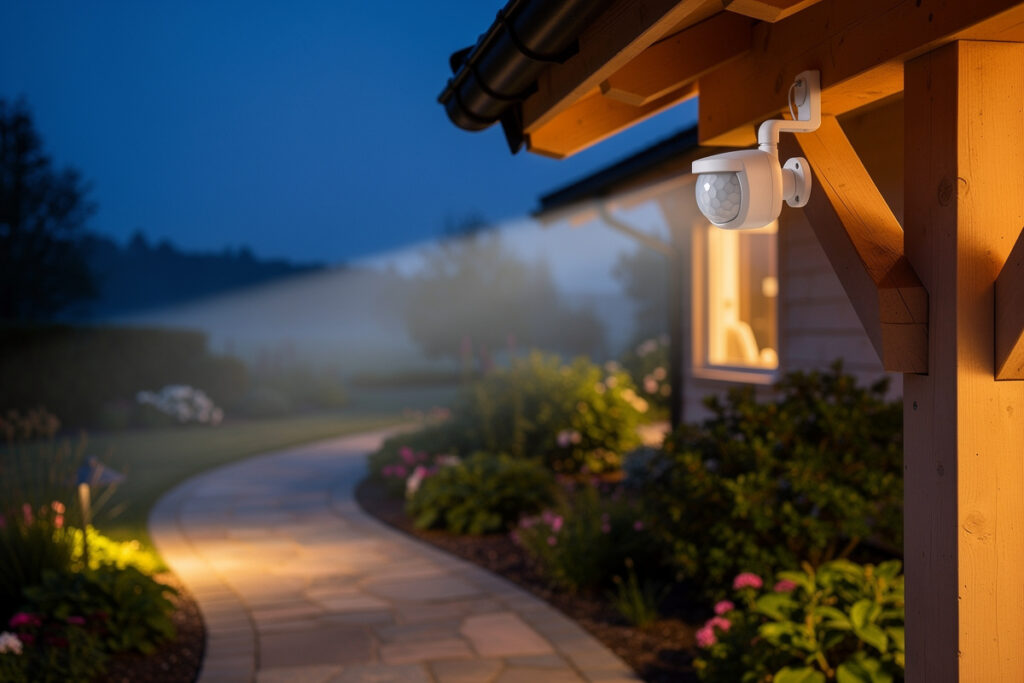
An outdoor motion sensor needs IP65 or better and a mounting height of roughly 2 to 2.5 meters angled slightly downward to cover the approach without catching every passing car. Placement decides reliability far more than the sensor’s spec sheet. Aim it across the path of travel, not straight at it, for the most reliable PIR triggering.
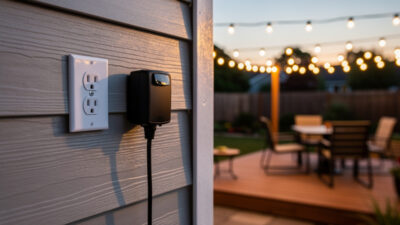
PIR sensors trigger most reliably when movement crosses the beams sideways rather than walking directly toward the lens, so mount them to catch people moving across the zone. Keep them out of direct afternoon sun, which can wash out the heat differential and cause both misses and false trips, and shield them from headlights if they overlook a road. For battery sensors at the far end of the garden, remember they need a mains-powered repeater — an outdoor smart plug on the exterior wall is the node that keeps them connected to the mesh.
Automations Worth Building
The best outdoor sensor automations combine presence with conditions: lights that fade up only after sunset and only if no one is already outside, an alert that fires when motion is detected while the house is in “away” mode, and a camera that starts recording on a sensor trigger rather than running constantly. Layer conditions so the system reacts smartly, not constantly.
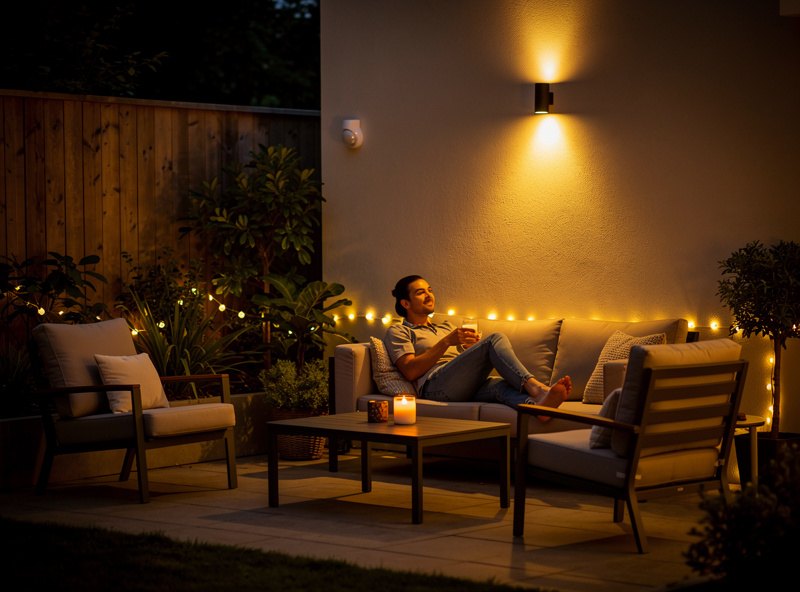
My most useful one is conditional: if the side-yard sensor sees motion after dark and the house is armed, fade the floodlights to full and push a notification — but if we’re home and it’s evening, just bring the path lights up gently. Same sensor, two completely different responses based on house state, which is only possible because the sensor is an entity on the hub rather than hardwired to one light. Another is energy-saving: the patio mmWave sensor holds the seating-area lights on while anyone is present and drops them a few minutes after the last person leaves. The same conditional logic extends naturally to the property edge, where a perimeter sensor can warn you before someone even reaches the house.
Outdoor Sensor Types Compared
Here is how the common outdoor sensor types compare on detection style, power draw, false-trigger tendency, and best use.
| Sensor Type | Detects | Power | False Triggers | Best For |
|---|---|---|---|---|
| PIR (passive infrared) | Movement only | Very low (battery) | Sun, pets, heat | Path and driveway triggers |
| mmWave presence | Presence + distance | Higher (often wired) | Wind, rain, foliage | Seating areas, porches |
| Dual PIR + mmWave | Both, cross-checked | Higher | Lowest | Reliable security zones |
| Camera-based detection | Objects (person/car) | Wired | Low (with object AI) | Vision + alerts |
Taming False Triggers
False triggers are the reason people abandon outdoor sensors, and almost all of them come from placement, pets, or weather. Aiming the sensor correctly, adding a pet-immunity setting or height adjustment, and requiring a second condition before acting eliminate the vast majority. A sensor that cries wolf gets ignored, so tune it.
The single most effective fix is requiring two signals before a consequential action: motion plus a time-of-day window, or PIR plus a camera’s person-detection confirming it’s actually a person and not a cat. In my automations, the “send me an alert” branch needs the object detector to agree it saw a person, while the “turn on the light” branch fires on raw motion because a false light-on costs nothing. Separating low-stakes from high-stakes triggers this way is what keeps the notifications meaningful. This sensor layer ties into the broader build covered in the smart outdoor automation guide, and pairs naturally with local-recording cameras like those in my no-subscription camera guide.
A Note on Gear
Some links below are affiliate links. If you buy through them I may earn a small commission at no extra cost to you. I only point to gear that fits the local-control approach I run.
For an outdoor sensor layer I’d look at a weatherproof outdoor PIR motion sensor for trigger zones, an mmWave presence sensor for areas where people linger, and a adjustable mounting bracket so you can aim the detection zone properly.
Frequently Asked Questions
What is the difference between PIR and mmWave outdoor sensors?
PIR sensors detect movement and go blind when you stop moving, while mmWave presence sensors detect that someone is actually there even when standing still. PIR is cheaper and battery-friendly; mmWave holds a zone occupied for lingering people but costs and draws more.
How high should I mount an outdoor motion sensor?
Mount outdoor motion sensors around 2 to 2.5 meters high, angled slightly downward and aimed across the path of travel rather than straight at it. PIR triggers most reliably when movement crosses its beams sideways, and downward angling avoids catching distant traffic.
Why does my outdoor motion sensor false trigger?
Most false triggers come from direct sun warming surfaces, pets, headlights, or wind-blown foliage. Re-aim the sensor away from these, use a pet-immunity or height setting, and require a second condition such as a time window or camera confirmation before high-stakes actions.
Can outdoor sensors work without internet?
Yes, if they connect to a local hub over Zigbee or Z-Wave. The hub processes the trigger and runs the automation locally, so lights and alerts still fire during an internet outage. Cloud-only sensors stop working when their server is unreachable.
Do outdoor sensors need a hub or repeater?
Battery Zigbee and Z-Wave sensors at the edge of a property usually need a mains-powered repeater, such as an outdoor smart plug on the exterior wall, to stay connected. Without a repeater, distant sensors drop offline intermittently, especially in wet weather.
Are mmWave sensors good for outdoor security?
They can be, especially paired with PIR or a camera to cross-check. mmWave detects standing presence that PIR misses, but wind and rain can register as motion outdoors, so combining it with a second signal gives the most reliable security triggering.