Smart Home Presence Detection: The Complete Guide
Smart home presence detection is the difference between a house that reacts to movement and one that knows a room is occupied — and it comes down to one question: does the sensor keep firing when you sit still? A cheap PIR sensor reports motion, then goes quiet after 60 seconds of you reading; an mmWave radar presence sensor keeps reporting you for as long as you breathe in the room. Build your automations on the second and the lights never time out on you mid-call.
I spent my first year of Home Assistant treating motion sensors as presence sensors, and it cost me — lights shutting off during meetings, the bathroom fan killing itself while I was in the shower, a hallway that went dark exactly when I was carrying laundry through it. Presence detection is the single upgrade that made my automations feel like they understood the house instead of guessing at it. This guide is the map I wish I’d had: which sensor detects what, how to wire the logic so a room stays “occupied” correctly, and the mistakes that make good sensors look bad.
What Is Smart Home Presence Detection?
Presence detection means a system that knows a specific space is currently occupied by a person — not “something moved a minute ago.” Motion detection (the cheaper, older cousin) fires on a change in infrared heat and resets on a timer, so a still body is invisible to it. Presence detection, done properly, combines a sensor that reports continuously with room logic that holds the “someone is here” state until a real departure condition is met.
The distinction matters because most of the automations people actually want — “keep the lights on while I’m here,” “don’t start the vacuum while anyone’s home,” “lock the door only after everyone has left” — are presence problems dressed up as motion problems. I run a mix across my house: PIR for cheap transitional zones, mmWave for rooms where people sit still, and door contacts plus room logic to make the whole thing robust. The full breakdown of how presence differs from motion, with the latency and reset-time numbers, is in my mmWave vs PIR comparison.
Done right, presence becomes a first-class state in your hub — a boolean per room, “occupied” or “clear,” that every other automation can read. Once it exists, the lights, the climate, the vacuum, and the security routines all stop fighting each other and start sharing one source of truth.
mmWave vs PIR: When Do You Need True Presence?
A passive infrared (PIR) sensor sees warm bodies moving across its Fresnel lens segments and fires a digital pulse; an mmWave (millimeter-wave) radar emits 24 GHz or 60 GHz radio waves and detects the micro-motion of a chest breathing. PIR is $8–15 and instant-on but blind to a person sitting still; mmWave is $25–90 and holds a room for as long as you’re breathing in it.
I use both, on purpose. The hallway gets a PIR because you’re always moving through it and I want sub-second reaction. The office gets mmWave because I sit at a desk for two hours without moving enough to trip a PIR — and I got tired of waving my arms every four minutes to bring the lights back. The tradeoff isn’t “which is better,” it’s “which failure mode can this room tolerate.” A deeper dive into the exact crossover — where PIR stops working and mmWave starts earning its price — is in the mmWave vs PIR sensor guide.
One thing the spec sheets won’t tell you: PIR sensors are digital motion switches with a fixed reset time (often 60–90 seconds), and that reset time is the whole game. Set it too short and the lights strobe on a still reader; too long and the room “thinks” you’re still there for a minute after you leave. mmWave sidesteps the reset-time problem entirely because it reports continuously — but it introduces its own, which is false triggers, and that’s worth its own section below.
Which mmWave Presence Sensors Actually Hold a Room?
The mmWave sensors worth running in 2026 are the Everything Presence One (an ESPHome-based community favorite with an LD2410/LD2450 radar), the Aqara FP2 (a polished zone-mapping sensor), and the Seeed Studio MR24HPC1 kit — they range from about $25 for a bare DIY module to $80+ for the Aqara, and the deciding factor is whether you want zones, local control, or raw price. All three actually hold a still body; the cheap Tuya “human presence” radar modules hold a room too, but their firmware is inconsistent.
In my office I run an Everything Presence One on ESPHome wired into Home Assistant over Wi-Fi, fully local — no cloud, no app, no manufacturer’s server between me and my own occupancy state. I picked it over the Aqara FP2 because I wanted the sensor data to live on my hub, not pass through a vendor bridge, and because ESPHome lets me expose illuminance, distance, and motion targets as separate entities I can write rules against. The Aqara is the right call if you want to draw zones on a phone map and not think about YAML. If you’re trying to decide which hardware fits your rooms, I’ve written up the full field in the best mmWave presence sensor roundup.
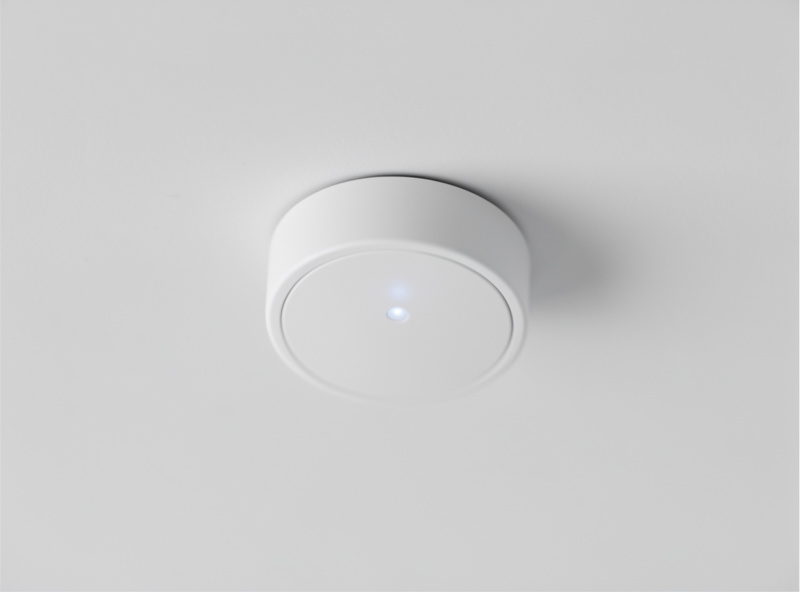
The honest caveat on all of them: the cheapest bare-radar modules ($10–15 Tuya boards) will technically detect presence, but their sensitivity drifts and the detection distance config is fiddly. Spend the extra $15 for a sensor with a real ecosystem around it — ESPHome, Aqara, or a well-documented Zigbee module — and you’ll spend your evening on automations instead of firmware.
Why mmWave False-Triggers (and How to Tune It Out)
mmWave false triggers come from three sources: fans and HVAC vents moving air and curtains, pets walking through the field, and reflective surfaces bouncing the radar into adjacent rooms — and the fix is tuning detection sensitivity, distance gates, and using the “moving target” vs “static target” signal your radar exposes. A poorly tuned mmWave sensor will hold a room “occupied” for hours after you’ve left because it’s watching the ceiling fan.
I learned this one the hard way. My first mmWave install was in a small guest bathroom with an exhaust fan, and for two weeks the bathroom reported “occupied” permanently — the fan’s spinning blades read as a moving target, and the sensor never went clear. You could hear the fan’s low hum running around the clock and feel the faint pull of air across the sensor’s lens every time you walked past the door; that draft was exactly what the radar was locked onto. The light stayed on around the clock. The fix was turning down the sensitivity on the near distance gates and adding a helper that required a door-open event to reset occupancy. Every radar exposes per-gate sensitivity for a reason; if you’re fighting a stuck-occupied room, that’s the first dial to reach for, and I’ve written the full tuning playbook in the mmWave false triggers guide.
The lesson, which took me embarrassingly long to internalize: a presence sensor is only as good as its ability to report the room is empty. Anyone can make a sensor that says “someone’s here.” Making one that reliably says “the room is clear” — without being fooled by a curtain, a cat, or a convection heater — is the actual engineering problem, and it’s where most people give up and go back to PIR.
How Do You Build Room-Occupancy Logic?
Room-occupancy logic is the software layer that turns raw sensor events into a stable “this room is occupied” boolean — typically a helper (input_boolean) that turns on when presence or motion fires and turns off only when multiple conditions agree the room is actually empty, such as “no presence for 5 minutes AND the door opened and closed.” Without this layer, one flaky sensor reading flips your lights randomly.
This is the part that separates people with sensors from people with a working smart home. The pattern I run in every room is: motion or presence sets the room occupied immediately (instant on, no delay — you never want to wait for a light); a timer holds the occupied state; and the room only clears when the timer expires with zero fresh presence events. For rooms with a single door, I add a door-contact condition: the room can only transition to clear if the door has opened since the last presence event. That single rule killed about 90% of my false “lights went off while I was reading” complaints.

The full blueprint — the helper structure, the timer values per room type, and the door-condition trick — is in my room-occupancy automation logic guide. The short version: never let a single sensor reading turn a room off, always require time plus a corroborating signal, and your house stops flickering at you.
Can You Track Phones Per-Room, Locally, With ESP32?
Yes — an ESP32 running ESPHome can act as a Bluetooth room beacon reader, measuring the RSSI (signal strength) of each family member’s phone as it moves between rooms, and reporting per-room presence to Home Assistant over Wi-Fi with no cloud. It costs about $5 per room in ESP32 boards and gives you phone-based room tracking that stays entirely on your own network.
This is the bridge between “is anyone home” (house-level presence) and “who is in which room” (room-level identity). I run a couple of ESP32s as BLE room assistants, and combined with mmWave it’s powerful — the radar says the room is occupied, the BLE reader says it’s specifically my phone, and the automation can act on identity, not just bodies. It’s also the most privacy-respecting way to do room tracking I’ve found, because the RSSI data never leaves the house. If you want to build this, I’ve documented the ESPHome config and the room-assistant approach in the ESP32 Bluetooth room presence guide.
The catch: BLE room presence assumes everyone carries a phone with Bluetooth on, which means it’s blind to guests and kids who don’t have devices. That gap is exactly why I don’t rely on phone tracking alone — it’s a layer on top of sensor-based presence, never a replacement for it. Which leads directly into the next problem.
Presence Detection Without a Phone: Guests and Kids
For people without a paired phone — guests, small children, anyone whose device isn’t on your network — you fall back to sensor-based presence: mmWave, PIR, door contacts, and pressure mats that detect a body rather than a device. The rule of thumb in my house is that any room automation has to work for a visitor who walked in with no phone at all, or it’s broken by design.
This is why I keep sensor-based presence as the foundation and treat phone tracking as an enhancement. The guest bathroom doesn’t know or care whose phone is in it — the mmWave knows a body is there, the door contact knows someone entered, and the lights behave correctly for a first-time visitor exactly as they do for me. If you build presence only around “is Bob’s phone in this room,” the first time your mother-in-law visits and the lights won’t come on for her, you’ll understand why device-free presence matters. I cover the full set of phone-free strategies in the presence detection without a phone guide.
Bed Presence: Automations That Know You’re Actually Asleep
Bed presence detection tells your hub that someone is physically in the bed, using either an mmWave sensor aimed at the mattress, a pressure/mat sensor under the mattress, or a smart sleep mat — and it unlocks automations like “turn everything off and arm the doors when I’m in bed after 11pm” that no motion sensor can give you. A motion sensor can’t tell “lying still in bed” from “not in the bedroom at all.”
I run an mmWave in the bedroom aimed across the bed, and the bedtime automation it drives is one of the few I’d genuinely miss: once the bed is occupied after 10:45pm, the living-room lights fade, the doors lock, the thermostat drops two degrees, and the hallway night-light comes on at 5%. None of that works with a PIR, because a sleeping body is a perfectly still body. The hardware options and the automation design — including the failure mode where a partner getting up at 3am shouldn’t trigger “everyone’s asleep” — are in the bed presence sensor automation guide.
House-Level Presence: How Your Hub Knows Anyone Is Home
House-level presence — the binary “is anyone home at all” — is best computed as a logical OR across every room’s occupancy boolean, plus a house-door contact and a geofence as fallback, so the house reads “occupied” if any room is occupied and “empty” only when every room is clear and a door has recently closed. Build that one helper and your vacuum, door locks, and security mode finally share a single signal they can trust.
This is the layer above room occupancy, and it’s where the payoff of doing presence well actually lands. The automation I care about most isn’t a light — it’s “when the house goes empty, run the robot vacuum, lock the doors, and switch to away mode.” None of that is safe to trigger on a single motion sensor clearing, because a single sensor clearing is wrong constantly: you walked into the yard, you sat still for two minutes, the cat walked past and didn’t trip the PIR. I debounce house-level presence hard — at least ten minutes of every room reading clear plus a door-open event — before the house is allowed to declare itself empty. That ten-minute number is the difference between a vacuum that starts while you’re on the porch and one that waits until you’ve actually left.
The failure mode to watch for is the false-empty during a real activity. Early on, my house declared itself empty while I was reading in a chair the PIR couldn’t see, and the doors locked behind me when I stepped out for the mail. That’s the exact reason house-level presence has to OR in every room’s occupancy — including the mmWave rooms that hold still bodies — rather than trusting the cheap sensors. The robust “everyone left” automation is the prize at the end of the presence work, and it only works if every room below it reports honestly.
Sensor Placement: Where You Mount It Changes Everything
Mount an mmWave presence sensor on the ceiling pointing down for whole-room coverage, or high on a wall aimed across the zone where people sit; keep it out of corners and never aim it at a fan, a curtain, or an HVAC vent. Where the sensor sits determines your coverage and your false-trigger rate more than any sensitivity setting ever will.
My first bathroom install failed for exactly this reason — I tucked the mmWave on a side wall aimed across the room, and its field caught the exhaust fan and the shower-curtain hem. It reported occupied forever. I remounted it on the ceiling, centered, pointing straight down, and the false triggers stopped that day. Ceiling-mount center is my default now for any room where I can route power there; wall-mount high and aimed works when I can’t. The radar sees a cone, so think about what’s inside that cone, not just whether the room is in range.
Power matters too. mmWave sensors draw too much for coin-cell battery life in my experience — plan on USB power or a mains-connected module, not a battery you’ll be swapping. PIR sensors are the opposite: they sip current and run for a year or more on a coin cell, which is why they’re perfect for the battery-powered Zigbee and Z-Wave door and motion contacts scattered around the house. I 3D-print little angled mounts for the ceiling mmWave units so I can fine-tune the aim after I see how the room behaves for a week — the aim is never right on the first try, and an adjustable mount saves re-drilling.
Latency: Why Instant-On Is the Whole Feel
Presence-driven lights need to come on in under a second or the automation feels broken, which means wiring the ON transition to fire immediately on the first presence event and applying any debouncing only to the OFF transition. A light that takes three seconds to acknowledge you is, from a standing-in-the-dark perspective, the same as a light that doesn’t work.
This is a rule I enforce everywhere in my automations: never debounce the on-side. The moment a sensor says “occupied,” the light starts its fade — no delay, no confirmation, no “wait and see.” The place for patience is the off-transition, where a timer of several minutes prevents flicker. PIR gives you sub-second on-reaction naturally; mmWave is typically one to two seconds because it has to confirm a static target, which is fine for a living room but is why I still reach for PIR in a hallway where a one-second delay reads as sluggish.
The feel of a well-tuned presence system is that the lights are just on when you need them and you stop noticing the automation at all. You notice presence systems when they’re wrong — a dark hallway, a light that strobes, a fan that quits on you. When they’re right, they’re invisible, and invisibility is the whole goal. Getting the on-latency under a second is the single biggest contributor to that invisibility, more than sensor accuracy or room count.
Hub, Radios, and Network: Where Presence Fits in a Local-First Stack
Presence detection lives or dies on your hub and your radios. My stack is Home Assistant OS on a dedicated Intel N100 mini-PC with SSD storage — not a Pi on an SD card, because a hub that corrupts its storage every six months takes your whole presence layer with it. The radios are a Sonoff/SLZB-class Zigbee coordinator running Zigbee2MQTT on a USB extension cable (kept away from USB 3.0 ports, which radiate 2.4 GHz noise and quietly wreck a Zigbee mesh), a Z-Wave stick for locks and long-range battery devices, and Thread/Matter border routers for the newer gear, built to the Matter specification maintained by the Connectivity Standards Alliance.
Local-first matters for presence specifically because presence is load-bearing — if your “lock the doors when everyone’s left” automation depends on a cloud server, it fails the night the cloud has a bad day. My presence state is computed on the hub, from sensors that report locally, over radios I control. The automations keep working when the internet doesn’t, and no manufacturer gets a vote on whether my lights come on. The same hub runs my grow-light schedules, the curing-chamber compressor, and the sauna pre-heat — one rule engine for the whole workshop and kitchen.
The network underneath matters too. All my IoT radios and sensors sit on their own VLAN, segmented from the laptops and phones, because dozens of chatty sensor devices on a flat home network is exactly how a smart home turns flaky at 9pm when everyone’s streaming. Presence sensors are low-bandwidth but they’re numerous, and isolating them keeps a misbehaving device from taking down the household Wi-Fi.
Presence Sensor Types Compared
No single sensor type solves every room. The table below is how I think about the tradeoffs — what each detects, how fast it reacts, and the failure mode you’re signing up for. Match the sensor to the room, not the other way around.
| Sensor type | Detects | Typical reaction | Best room for it | Main weakness |
|---|---|---|---|---|
| PIR motion sensor | Moving warm bodies | Sub-second on, 60–90s reset | Hallways, stairs, transit zones | Blind to a still person |
| mmWave radar presence | Breathing/micro-motion | 1–2s on, continuous hold | Office, living room, bed | Fans, pets, curtains false-trigger |
| Door/window contact | Open/close events | Instant | Single-door rooms, bedrooms | No presence info on its own |
| ESP32 BLE room beacon | A specific phone’s RSSI | 2–5s polling | Per-person room identity | Blind to people without phones |
| Bed pressure / sleep mat | Weight on mattress | Instant | Bed-only bedtime automations | Single-purpose, one location |
| mmWave + illuminance combo | Presence plus light level | 1–2s on | Rooms with daylight harvesting | More config, higher cost |
Read the table as a menu, not a ranking. My hallway is a PIR; my office is mmWave plus a door contact; my bedroom is mmWave; my bathroom is mmWave with the fan-sensitivity tuning described earlier. The right answer is almost always two sensor types corroborating each other — that’s what the room-occupancy logic layer is for.
How I’d Wire a Presence System Starting Today
If I were starting from an empty house tomorrow, I’d build presence in this order: one hub on real hardware, one radio per protocol I intend to use, then mmWave in the three rooms where people sit still (office, living room, bedroom) before touching anything else. Those three rooms are where bad presence detection is most painful, and mmWave solves them outright. PIR comes next for the transit zones, then door contacts to make every room’s “clear” decision robust, then ESP32 BLE tracking as the identity layer on top.
The single biggest leverage move is the room-occupancy logic layer, not the sensors. A house with $15 PIRs and good logic beats a house with $80 mmWave sensors and no logic, every time, because the logic is what stops the flickering and the false-darkening. Spend your first weekend on the helpers and timers, not on shopping for hardware. If you want the per-room blueprint, the room-occupancy logic guide is where I’d start, and the mmWave vs PIR decision tells you which sensor each room actually needs.
Presence detection is the layer that makes a smart home feel smart instead of random. Get it right and every downstream automation — lights, climate, security, the vacuum — gets more reliable for free, because they’re all finally reading from the same map of who is where.
As an Amazon Associate I earn from qualifying purchases.
Related Reading
- mmWave vs PIR: When True Presence Beats Cheap Motion
- Best mmWave Presence Sensors: What Actually Holds a Room
- mmWave False Triggers: Tuning Out Fans, Pets, and Curtains
- Room-Occupancy Logic: Lights That Never Leave You in the Dark
- ESP32 Bluetooth Room Presence: Per-Room Phone Tracking, Locally
- Bed Presence Sensors: Automations That Know You’re Actually Asleep
- Presence Detection Without a Phone: Sensors for Guests and Kids
What is the difference between presence detection and motion detection?
Motion detection fires on a moving warm body and resets after a fixed timer, so a person sitting still disappears. Presence detection uses sensors like mmWave radar that report continuously, so a still person stays detected. Presence is the right foundation for lights and automations that must stay on while someone is in the room.
Is an mmWave presence sensor better than a PIR motion sensor?
Not universally. mmWave holds a room occupied as long as someone is breathing, which suits offices and living rooms where people sit still. PIR is cheaper, faster, and better for hallways where people are always moving. Most homes need both, matched to each room.
Do presence sensors work when the internet is down?
A local-first presence system does. When the sensors report to a self-hosted hub like Home Assistant over Zigbee, Z-Wave, or Wi-Fi, the presence logic runs on the hub and the automations keep working without any cloud connection.
How many mmWave sensors do I need?
One per room where people sit still for long periods, typically the office, living room, and bedroom. Transit zones like hallways and stairs are better served by cheaper PIR sensors. A good starting point is three mmWave sensors covering the still-body rooms, then expand from there.
Can presence detection work for guests who do not have a phone?
Yes, if it is built on body-detecting sensors like mmWave and PIR rather than phone tracking. Phone-based presence (BLE room tracking) is an identity layer on top, not the foundation. A visitor with no phone should still get correct lights and automations from sensor-based presence.