How to Install a Smart Dimmer Switch — DIY Guide (2026)
Installing a smart dimmer switch involves turning off power at the breaker, removing the old switch, identifying your wires (line, load, neutral, ground), connecting them to the new smart switch, and securing everything in the electrical box. The process takes 30-60 minutes for someone with basic electrical knowledge. Smart dimmer switches like the Lutron Caseta, TP-Link Kasa, and GE Enbrighten offer app control, scheduling, and voice integration that transforms any dimmable bulb into an intelligent lighting system.
This guide provides step-by-step installation instructions while emphasizing safety throughout. If you’re not comfortable working with electrical wiring, hire a licensed electrician. Improper installation can create fire hazards, shock risks, or damage to your home’s electrical system.
As an Amazon Associate I earn from qualifying purchases.
Safety First: Before You Begin
Electrical work requires absolute attention to safety protocols. Follow these precautions without exception:
Essential Safety Steps
- Turn off power at the circuit breaker: Never rely on wall switches alone. Locate the correct breaker and switch it completely off.
- Test for live wires: Use a non-contact voltage tester on the switch and nearby wires to confirm power is truly off.
- Work during daylight or with battery-powered lighting: You’ll be without electricity in the work area.
- Wear rubber-soled shoes: Reduces ground conductivity if accidental contact occurs.
- Have a helper nearby: Someone who knows which breaker you turned off in case of emergency.
If at any point you feel uncertain about the wiring configuration, stop and consult an electrician. Guessing with electrical connections risks serious injury or fire.
Tools You’ll Need
- Non-contact voltage tester ($10-15)
- Phillips and flathead screwdrivers
- Wire stripper/cutter
- Needle-nose pliers
- Electrical tape
- Wire nuts (often included with smart switch)
- Flashlight or headlamp
- Smartphone for taking “before” photos of wiring
Understanding Your Wiring
Standard Wire Colors and Functions
Modern electrical systems use color-coded wires for safety and consistency:
- Black wire: Hot/Line wire carrying power from the electrical panel (always treat as live until tested); in a standard single-pole box, black is also usually the Load wire running to the fixture
- Red wire: In a basic single-pole switch box you typically won’t see one at all — red shows up as a traveler wire in 3-way/4-way switch setups (carrying signal between switches, not switching the light circuit itself), or occasionally as a second hot leg on other circuits
- White wire: Neutral wire completing the circuit back to the panel (often multiple white wires bundled)
- Bare copper or green wire: Ground wire for safety, directs electrical faults safely away
Per standard US electrical wire color conventions, these colors are conventions the NEC establishes as a starting point, not a strict guarantee — some installations, particularly older homes or three-way switch setups, may have different configurations. Always verify with a voltage tester before assuming wire functions.
Checking for Neutral Wires
Most smart dimmer switches require a neutral wire connection to power their internal electronics. Without a neutral wire, the switch cannot maintain Wi-Fi connectivity or smart functions.
To identify your neutral wires:
- Look for white wires in the electrical box, often capped together with a wire nut and not connected to the existing switch
- The neutral wire should read no voltage with a tester when power is on (test carefully)
- If your box contains only black and bare wires with no white wires, you likely lack neutral wires
If you don’t have neutral wires, you have three options:
- Choose a “no-neutral” smart switch (limited selection, often dimmer only, fewer features)
- Hire an electrician to pull neutral wires (expensive, may require wall repair)
- Use smart bulbs instead of a smart switch
Popular no-neutral options include the Lutron Caseta (uses proprietary Clear Connect wireless protocol) and certain GE Enbrighten models.
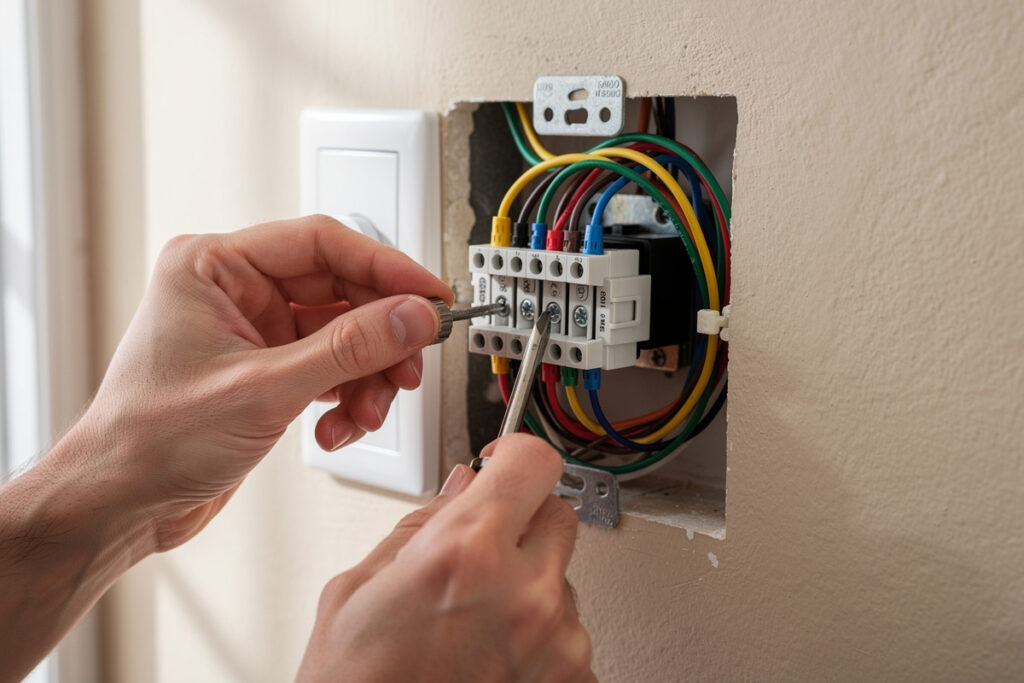
Step-by-Step Installation
Step 1: Turn Off Power and Verify
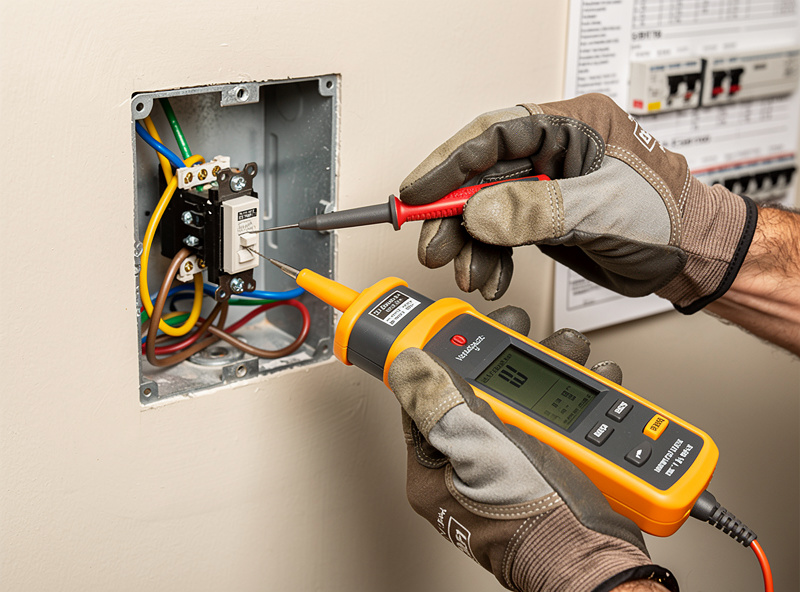
Locate your home’s electrical panel and identify the breaker controlling the switch you want to replace. Switch it to the OFF position. Test the switch to confirm lights don’t work.
Remove the existing switch faceplate with a flathead screwdriver, then unscrew the switch from the electrical box. Gently pull the switch forward to access the wiring. Test all visible wires with a non-contact voltage tester to confirm no power is present.
Take clear photos of the existing wiring before disconnecting anything. These serve as reference if you encounter confusion during installation.
Step 2: Disconnect the Old Switch
Identify which wires connect to your existing switch. Standard switches have two brass or black screw terminals plus a green ground screw:
- The wire on one side is the Line (power from panel)
- The wire on the other side is the Load (power to light)
- The green or bare wire is Ground (safety)
Disconnect wires by loosening the terminal screws or removing wire nuts. Straighten any bent wire ends with needle-nose pliers.
Keep track of which wire was which. Label them with masking tape if necessary: “LINE” and “LOAD”.
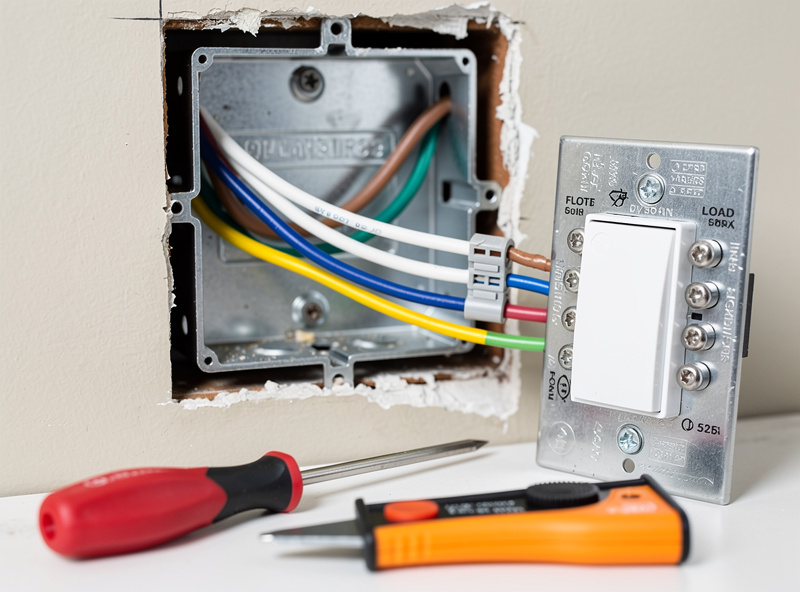
Step 3: Identify All Wires in the Box
With the old switch removed, examine all wires in the electrical box:
- Black or red wires: These carry power. You may have multiple black wires wire-nutted together
- White wires: Usually bundled together with a wire nut. These are your neutral wires
- Bare or green wires: Ground wires, often connected to the metal box or each other
If you have multiple black wires in the box, the one that was connected to the old switch is your Load wire. The other black wires likely include the Line wire and possibly wires going to other switches or outlets.
Step 4: Connect the Smart Dimmer Switch
Smart dimmer switches have clearly labeled terminal screws or wire leads:
- LINE or HOT: Connect the black wire from your electrical panel (power source)
- LOAD: Connect the black or red wire going to your light fixture
- NEUTRAL: Connect to the white neutral wires (often requires adding a pigtail wire)
- GROUND: Connect to the bare copper or green ground wire
For wire connections:
- Strip 3/4 inch of insulation from wire ends if needed
- Use wire nuts to connect smart switch leads to house wires (twist clockwise until tight)
- Gently tug each connection to verify it’s secure
- Wrap electrical tape around wire nuts for extra security (optional but recommended)
If your smart switch has terminal screws instead of wire leads:
- Curve wire ends into hook shapes using needle-nose pliers
- Hook wires clockwise around terminal screws so tightening pulls them tighter
- Tighten screws firmly but don’t strip the threads
Step 5: Connect Neutral Wires
Most smart switches require connecting to the neutral wire bundle in your electrical box:
- Remove the wire nut from the existing neutral wire bundle (white wires)
- Add the smart switch’s white neutral wire to the bundle
- Twist on a new wire nut large enough to accommodate all wires
- Tug gently to confirm secure connection
If your smart switch requires a pigtail connection and your existing neutral bundle is full, you may need to add a small jumper wire to extend the neutral connection capacity.
Step 6: Connect Ground Wires
Ground connections are essential for safety:
- Locate the bare copper or green ground wires in the box
- Connect the smart switch’s green or bare ground wire to the existing ground bundle
- If the box is metal and has a ground screw, ensure the ground wires connect to it
- Use a wire nut to secure all ground wires together
Never skip ground connections. They protect you from electrical shock if a fault occurs.
Step 7: Secure the Switch in the Box
Carefully fold the wires into the electrical box in a zigzag pattern. Don’t force them or pinch them against sharp metal edges. Position the smart switch so it sits flush with or slightly recessed from the wall surface.
Screw the smart switch to the electrical box using the provided mounting screws. Don’t overtighten, as this can crack the switch housing or strip the screw holes.
Ensure the switch face is level and oriented correctly (on/off labels readable).
Step 8: Install Faceplate and Restore Power
Attach the wall plate over the switch. Smart switches often include custom faceplates that accommodate their slightly different dimensions compared to standard switches.
Return to your electrical panel and turn the breaker back ON.
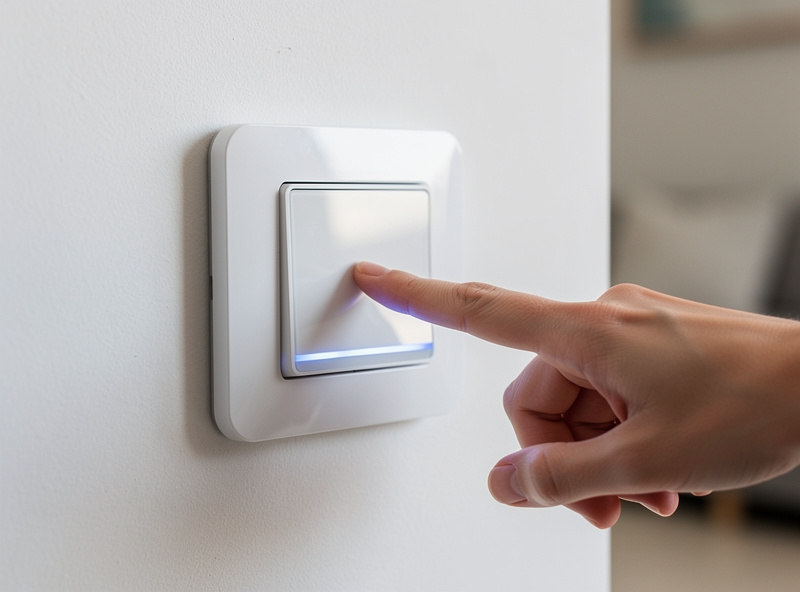
Step 9: Test and Configure
Press the smart switch to verify the connected lights turn on and off. Test the dimming function by pressing and holding or using the dimmer slider if present.
Download the manufacturer’s app and follow pairing instructions to connect the switch to your Wi-Fi network. This typically involves:
- Creating an account in the app
- Putting the switch in pairing mode (often by holding a specific button)
- Selecting your Wi-Fi network and entering the password
- Waiting for the connection to establish (30-60 seconds)
Once connected, test app control, scheduling features, and voice assistant integration.
Common Installation Challenges
Box Too Small or Crowded
Smart switches are often larger than traditional switches and require more wire connections. If your electrical box feels cramped:
- Consider replacing the box with a deeper “old work” box
- Ensure wires are properly folded, not just crammed
- Use smaller wire nuts if space is tight
- Don’t force the switch if wires are pinched
Multiple Switches Control the Same Light (Three-Way)
Three-way switches (two switches controlling one light) require special handling. You need:
- One smart switch designed as the “master”
- One companion switch or standard switch for the secondary location
- Proper identification of traveler wires (usually red)
Three-way installations are significantly more complex. If you’re not experienced with electrical work, hire an electrician for these setups.
No Neutral Wire Available
If your box lacks neutral wires, your options are:
- Lutron Caseta dimmers work without neutral wires but require their proprietary bridge
- Some GE Enbrighten models are designed for no-neutral installations
- Consider smart bulbs instead, which don’t require switch replacement
Dimmer Compatibility Issues
Not all LED bulbs dim properly with all smart dimmers. If you experience:
- Flickering: Bulb and dimmer are incompatible. Try a different bulb brand or look for “dimmable LED compatible” switches.
- Not dimming low enough: Some bulbs have minimum load requirements. Add more bulbs to the circuit or choose a different dimmer.
- Buzzing sounds: Electrical incompatibility between dimmer and bulb driver. Replace bulbs or dimmer.
Quality dimmable LEDs from brands like Philips, Cree, and GE typically perform best with smart dimmers.
Smart Dimmer Switch Comparison
| Switch | Neutral Required | Price | Best Feature |
| Lutron Caseta | No | $50-60 | Reliable, works without neutral |
| TP-Link Kasa | Yes | $15-20 | Budget-friendly with scheduling |
| GE Enbrighten | Optional | $25-40 | No-neutral options available |
| Leviton Decora | Yes | $40-50 | Professional-grade quality |
Post-Installation Configuration
Setting Up Schedules and Automation
Once installed, configure your smart dimmer for maximum convenience:
- Sunset/sunrise activation: Automatically turn on at dusk, off at dawn
- Wake-up routines: Gradually brighten bedroom lights in the morning
- Vacation mode: Random on/off patterns to simulate occupancy
- Bedtime routines: Dim or turn off lights at scheduled times
Voice Control Setup
Connect your smart dimmer to Alexa, Google Assistant, or Siri:
- Name the switch descriptively (“Living Room Lights” not “Dimmer Switch 1”)
- Test commands like “Alexa, dim living room lights to 50%”
- Create routines that combine multiple switches (“Goodnight” turns off all lights)
- Set up voice-activated scenes (“Movie Time” dims lights to 20%)
Learn about smart bulbs versus smart switches to determine the best approach for your home.
FAQ
Do I need a neutral wire for a smart dimmer?
Most smart dimmers require a neutral wire (white wire in the junction box). Homes built before the 1980s often lack neutral wires at switch boxes. Lutron Caseta is one of the few smart dimmers that works without a neutral wire, using its own wireless bridge instead.
Can I install a smart dimmer in a 3-way circuit?
Yes, but you need a smart dimmer designed for 3-way setups plus a compatible companion switch for the second location. Brands like Lutron, GE, and Zooz make 3-way kits. The smart dimmer replaces one switch while the companion replaces the other.
Will a smart dimmer work with any LED bulb?
No. Not all LED bulbs are dimmable, and even dimmable LEDs may flicker with certain dimmer models. Check the dimmer manufacturer compatibility list before purchasing. Lutron maintains the most comprehensive LED compatibility database of any smart dimmer brand.
How long does smart dimmer installation take?
A straightforward single-pole installation takes 15-30 minutes for someone comfortable with basic wiring. Three-way circuits take 30-45 minutes. If you have never worked with electrical wiring, budget an hour and watch the manufacturer installation video first.
Is it safe to install a smart dimmer yourself?
Yes, if you turn off the circuit breaker first and verify power is off with a voltage tester. Smart dimmer installation is similar to replacing a standard light switch. However, if you find aluminum wiring, knob-and-tube wiring, or no neutral wire, hire a licensed electrician.
Do smart dimmers save electricity?
Yes. Dimming compatible LED bulbs to 50 percent brightness typically cuts their energy draw by roughly 30-50 percent, since LED drivers don’t scale power linearly with dimmer position. Smart dimmers add scheduling and occupancy detection on top of that, so a bulb left dim overnight or off entirely instead of running at full brightness adds up over a year, though the exact dollar savings depend on your local electricity rate and how many hours the light actually runs.
Bottom Line
Installing a smart dimmer switch requires turning off power at the breaker, identifying your line, load, neutral, and ground wires, connecting them to the appropriate terminals on the smart switch, and securing everything in the electrical box. The process takes 30-60 minutes for basic single-pole installations and provides years of convenient automated lighting control.
Prioritize safety throughout: test for live wires, work with power off, and consult an electrician if you encounter unfamiliar wiring configurations. Most installation challenges stem from missing neutral wires (choose Lutron Caseta or no-neutral models) or incompatible LED bulbs (try quality dimmable LEDs from major brands).
Once installed, smart dimmers offer scheduling, voice control, and automation that transforms standard lighting into an intelligent system. Configure sunset activation, morning wake-up routines, and vacation modes to maximize convenience and energy savings.
Want to explore other complete smart lights buyer guideing options? Check out the comparison of smart bulbs versus smart switches to choose the right approach for each room in your home.
Related Articles
- Best Smart Lights 2026: Complete Buyer Guide
- Smart Bulb vs Smart Switch: Complete Comparison
- Smart Bulb Color Temperature Explained
- Best Smart Outdoor Lights for Security
- Best Smart Lights for Apartment Renters