Wi-Fi-Controlled Grow Lights: Schedules That Match Your Plants
A Wi-Fi-controlled grow light scheduled to a plant’s actual photoperiod — not a generic “12 hours on, 12 hours off” timer — gives you meaningfully healthier, more consistent growth. The reason isn’t the smart switch — it’s that LED grow lights run high-current loads (60–200 W is typical), heat soak fixtures change emission spectrum across the day, and only a scheduling system that ramps and adjusts spectrum mimics the natural light curve plants evolved with.
This guide covers what a Wi-Fi grow-light schedule should actually do, which fixtures expose the controls you need, and how to build the schedule across Alexa, Google, or Home Assistant. For the data that drives the schedule itself — DLI requirements, PPFD targets, photoperiod by plant — pair this with the smart hydroponic sensors guide, which covers the Wi-Fi PAR meters and lux sensors that turn an open-loop schedule into a closed-loop one.
What a Smart Grow-Light Schedule Should Do
A simple on/off schedule is table stakes. The features that earn the “smart” label and actually move plant outcomes:
- Sunrise/sunset ramps — 30-minute fade-in and fade-out instead of hard on/off prevents leaf shock and reduces the brief 4 K spectrum spike LEDs produce at cold start.
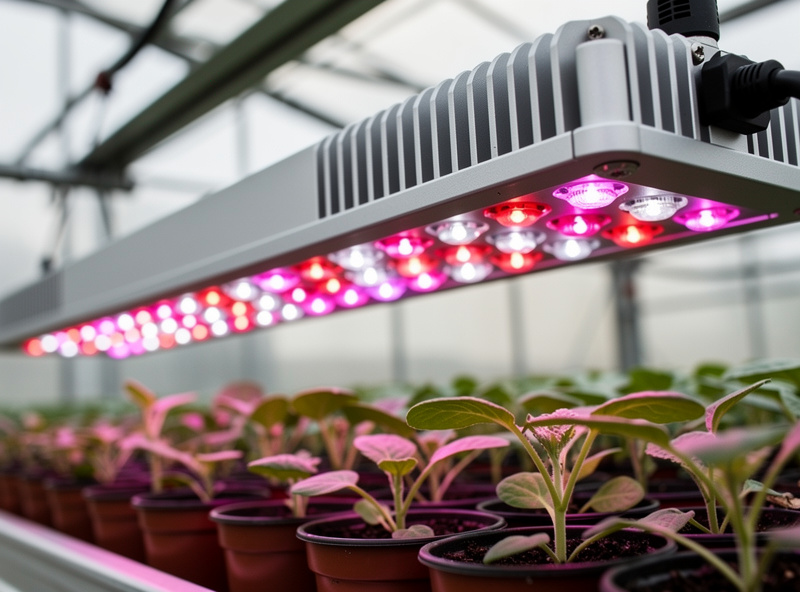
- Spectrum shifts by growth stage — blue-heavy (450 nm dominant) for veg, red-heavy (660 nm dominant) for flower; switchable Wi-Fi fixtures change ratio on schedule.
- Dimmer-over-time — full intensity for 4 hours mid-photoperiod, 70% intensity for the bracketing 4 hours.
- Conditional dimming — dim 30% if room temperature exceeds 28 °C (LED efficiency drops, heat damages plants).
- Failure alerts — push notification if energy draw deviates from baseline (a failed driver still reads “on” without producing light).
None of this is exotic. Any decent quantum-board LED with smart drivers (Mars Hydro FC-E series, Spider Farmer SE/EVO, ViparSpectra XS-Pro Plus) exposes at least dim and on/off through Wi-Fi. Spectrum control is rarer — Mars Hydro’s TS-W and Spider Farmer’s G-series have it.
Fixture Compatibility for Smart-Home Voice Ecosystems
Most LED grow lights are sold to indoor growers with their own scheduler app. Voice integration is a separate question and lags the rest of smart home by 2–3 years.
- Mars Hydro Wi-Fi (FC-E, TS-W) — proprietary app, Alexa skill available, no Google Home, no Home Assistant without HACS work.
- Spider Farmer SE/EVO Wi-Fi — Tuya-compatible firmware on most 2025+ models. Means Alexa, Google Home, and SmartThings work natively. Home Assistant via LocalTuya integration.
- ViparSpectra XS-Pro Plus — VS app only, no voice integration as of early 2026.
- HLG (Horticulture Lighting Group) — RDM/DMX dimming on commercial models, no consumer Wi-Fi. Pair with a generic Wi-Fi 0–10 V controller for smart-home integration.
- Generic smart-plug solution — any “dumb” grow light controlled by a TP-Link Kasa, Wyze, or Tuya smart plug works for on/off but loses dimming and spectrum control.
If you’re buying for smart-home integration, Spider Farmer Tuya-firmware models give you the cleanest path across all three voice platforms. Browse the smart plug roundups for the bridges that handle non-Wi-Fi grow fixtures.
Building the Schedule in Alexa
Alexa handles the basics — full intensity from sunrise-offset to sunset-offset — well, but its routine engine struggles with multi-stage schedules. A working build:
- Pair the grow light through its native app first; confirm dimming works there.
- Install the brand’s Alexa skill (Mars Hydro, Tuya, Spider Farmer Smart) and link the account.
- Run device discovery; the light appears as either a switch (basic) or a smart light (with dim).
- Create routine 1: 6:00 AM → set light to 30% — kicks off ramp.
- Create routine 2: 6:30 AM → set light to 100% — full intensity.
- Create routines 3 and 4 mirroring this for the evening fade-down.
The “30% then 100%” approach fakes a ramp because Alexa doesn’t natively offer “fade over 30 minutes.” Some users prefer a single-step on/off and accept the leaf-shock — for fast-vegging plants the difference rarely shows. For seedlings and clones, the ramp is meaningful.
Building the Schedule in Google Home
Google’s automation engine handles conditional logic better than Alexa’s, which matters once you start layering temperature checks. A representative Google build:
- Link the grow-light brand service in Google Home → Settings → Works with Google.
- Create a “Grow Tent” room and place the light in it.
- Create automation: At 6:00 AM → adjust brightness to 30% → wait 30 minutes → adjust brightness to 100%.
- Create a conditional: If temperature sensor reading > 28 °C → set brightness to 70%.
- For evening: at sunset offset → reverse the morning ramp.
Google’s edge: the temperature condition is easy to add. Pair the grow tent with a Wi-Fi temperature sensor (smart-air-quality category devices) and Google reads it directly. Alexa requires more routine plumbing for the same outcome.
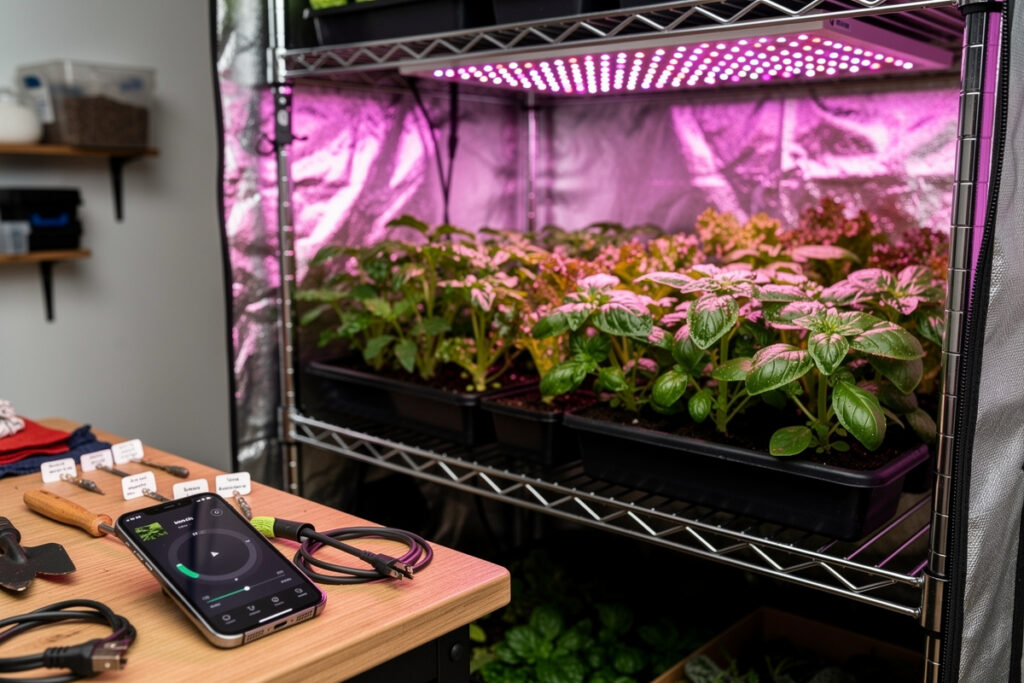
Building the Schedule in Home Assistant (Local + Closed Loop)
Home Assistant is where horticultural-grade scheduling lives. The benefit isn’t voice control — it’s that the schedule survives internet outages, can read PAR/PPFD sensors directly, and can dim in 1% increments via YAML.
A representative Home Assistant grow-light setup:
- Light entity — LocalTuya integration for Spider Farmer, ESPHome firmware for DIY drivers, Mars Hydro via HACS.
- Time-of-day automation — sunrise offset trigger, ramp from 0% to 100% over 30 minutes via `light.turn_on` with `transition: 1800`.
- Spectrum scheduling — for switchable fixtures, change spectrum at 14-day intervals tracking the plant’s growth stage.
- PAR-based closed loop — read a Wi-Fi PAR meter, dim if PPFD exceeds setpoint by 10%.
- Energy monitoring — energy sensor on the smart plug feeding the driver; alert if 24-hour kWh deviates > 15% from baseline.
That last point catches the silent-failure mode where an LED driver dies without de-asserting its on-state — your app says “running,” your plants say otherwise, and nobody knows until the next manual inspection. The energy sensor catches it within a day.
Why the Ramp Matters (and When It Doesn’t)
Hard on/off cycles produce a measurable stress response in C3 plants: a sudden jump in irradiance can trigger photooxidative stress — the same mechanism behind yellowing mid-leaf bands and brittle margins from an abrupt light change — while gradual increases let photosynthetic enzymes activate sequentially and use the light more efficiently. A 30-minute ramp avoids that shock at both ends of the photoperiod, and over a 60-day flower cycle avoiding it consistently adds up.
The exception is C4 plants — corn, sugar cane, sorghum — which don’t show the same stress response and where ramps add complexity for no measurable benefit. Tomatoes, peppers, cucumbers, lettuce, and herbs are all C3 and benefit. If you’re growing the latter set, the ramp is worth setting up.
When Wi-Fi Grow Lights Are Overkill
Skip the smart-home integration if any of these apply: you’re growing one or two herb plants on a windowsill (a $12 mechanical timer is sufficient), your grow space is in a basement with no Wi-Fi (signal extension costs more than the lights), or your local utility doesn’t have time-of-use rates (off-peak scheduling has no economic value).
For everyone else — small grow tents, smart-home enthusiasts, anyone running 200 W or more of LED — a Wi-Fi schedule is the difference between a hobby grow and a system that actually optimizes. The hardware premium for Wi-Fi fixtures is roughly 15–25% over equivalent dumb LEDs, which the energy savings from off-peak scheduling typically recoup inside 18 months on time-of-use plans.
As an Amazon Associate I earn from qualifying purchases.
Frequently Asked Questions
Do I need a smart grow light or will a smart plug work?
A smart plug works for on/off scheduling on any grow light, but you lose dimming and spectrum control. For seedlings and herbs the on/off is enough. For flowering plants where ramping and intensity tuning matter, a Wi-Fi grow light with native dim is the right tool.
Does Wi-Fi interference affect grow lights?
Modern grow lights with Wi-Fi 4 or Wi-Fi 5 radios are stable in typical home Wi-Fi environments. Issues mostly come from cheap drivers leaking RF into the 2.4 GHz band, which can drop the light from your network without affecting plant performance directly.
What photoperiod should I schedule for vegetables?
Lettuce and leafy greens grow well at 14 to 16 hours of light per day. Tomatoes and peppers prefer 14 to 18 hours during vegetative growth and 12 to 14 hours during fruiting. Herbs are flexible and accept anywhere from 12 to 16 hours.
Can I dim grow lights with Alexa?
Yes, if the grow light brand exposes brightness control through its Alexa skill. Spider Farmer Tuya-firmware models, Mars Hydro Smart, and Sansi Wi-Fi all support Alexa dim commands. Brands with on/off only smart plugs do not.
Should the grow light schedule track sunrise and sunset?
Yes for outdoor seedlings and indoor plants on windowsills, no for fully indoor grow tents. Indoor plants in sealed tents with no exterior light should follow a fixed schedule. Tracking sunrise outside the tent confuses the photoperiod.
How do I know my grow light is actually producing light?
Add a Wi-Fi PAR meter or a simple lux sensor inside the tent and read it through Home Assistant or the brand app. A failed LED driver can report on while producing zero light. Energy monitoring on the smart plug also catches this within 24 hours.
Is it worth using time-of-use electricity rates for grow lights?
Yes if you have a 5 cent per kWh or larger off-peak window and your photoperiod fits inside it. Running a 200 watt grow light for 14 hours per day on off-peak versus on-peak rates saves about 60 to 90 dollars per year, which pays for the Wi-Fi fixture premium.
Related Articles
- Best Smart Lights — buying guides, ecosystems, automation
- Smart Plugs — for non-Wi-Fi grow fixtures
- Voice Assistants and Protocols — Alexa, Google, Home Assistant
- Smart Air Quality and Climate — temperature sensors for grow tents
- Smart hydroponic sensors guide (SmartHydroLab)