Smart Light Strip Behind TV — Setup Guide (2026)
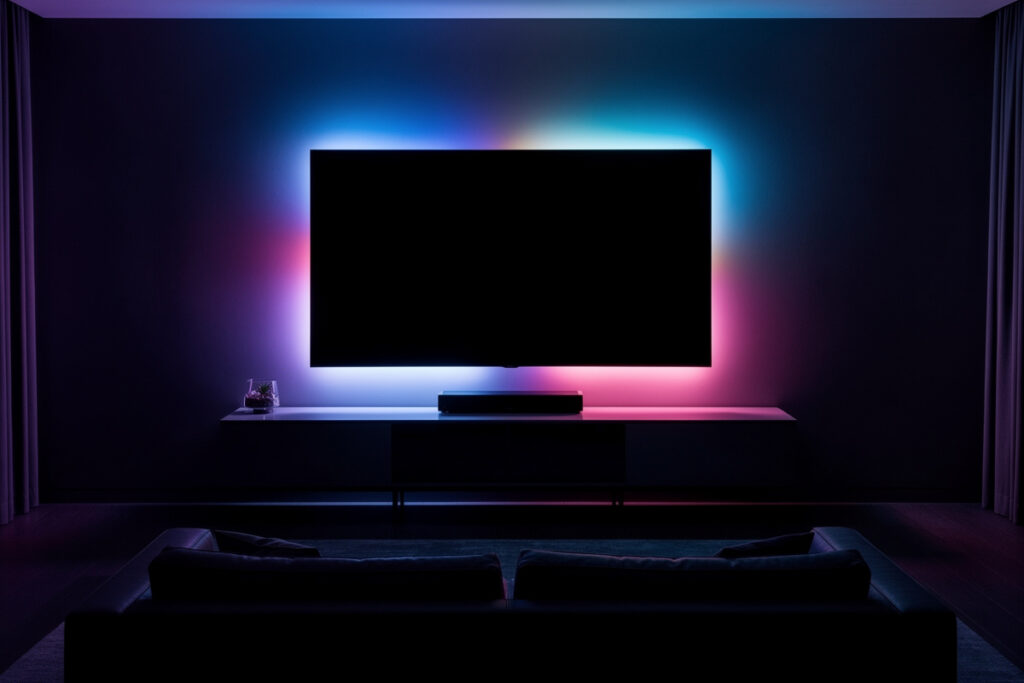
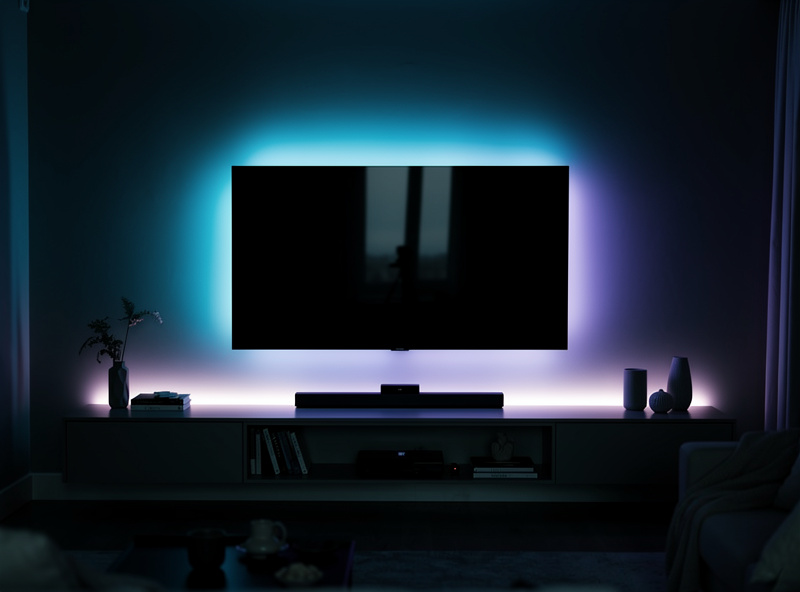
Installing a smart light strip behind your TV creates immersive bias lighting that reduces eye strain and enhances your viewing experience. This setup process takes 30-45 minutes and requires a compatible LED strip, power source, proper placement, and app configuration. The lights synchronize with your screen content or remain static for ambient backlighting that improves contrast perception and reduces fatigue during long viewing sessions.
Here is what most buyers get wrong: they pick a strip that is too short, place it too close to the TV edge, or skip the surface prep — and then wonder why the effect looks uneven and the adhesive gives up. I have made all three mistakes. The good news is that getting it right takes 30 minutes and the result is a clean wall wash that makes your TV feel twice as expensive. Below I will walk through exactly which strip to buy, where to place it, and how to configure it — including the screen-sync feature that turns your living room into a theater.
As an Amazon Associate I earn from qualifying purchases.
Why Add Smart Lighting Behind Your TV?
Bias lighting serves multiple purposes beyond aesthetics. When you watch TV in a dark room, the bright screen contrasts sharply with surrounding darkness, causing your pupils to constantly dilate and contract. This creates eye strain, headaches, and reduces perceived image quality.
Smart light strips behind your TV provide:
- Reduced eye strain: Ambient backlighting reduces the contrast between screen and room
- Enhanced contrast: Your eyes perceive deeper blacks and brighter whites with proper bias lighting
- Immersive viewing: Color-changing lights sync with on-screen action for movie theater ambiance
- Room aesthetics: Adds modern, sophisticated lighting even when the TV is off
The specific percentage comes from broadcast engineering, not eye-care research: SMPTE’s recommended practice for video monitoring (RP 166) calls for ambient bias lighting at roughly 10% of the display’s peak brightness at a 6500K (D65) color temperature — a broadcast-industry standard for reducing eye fatigue during screen viewing, not an eye-doctor prescription. Smart light strips let you adjust this dynamically based on content.
Choosing the Right Smart Light Strip
Size and Length Requirements
Measure your TV before purchasing. For a 55-inch TV, you need approximately 4-5 meters of LED strip to cover the top and both sides. Skip the bottom edge to avoid blocking ports and infrared sensors. A Govee Immersion TV Light Strip is a popular choice for bias lighting.
Most brands offer kits sized for common TV dimensions:
- 32-43 inch TVs: 2-3 meter strips
- 50-60 inch TVs: 3-4 meter strips
- 65-75 inch TVs: 4-5 meter strips
- 75+ inch TVs: 5+ meter strips or multiple kits
Key Features to Consider
Not all LED strips work equally well for TV backlighting. Look for these essential features:
- High LED density: 30-60 LEDs per meter creates smooth, even lighting without visible dots
- Color accuracy: RGB strips with separate white LEDs (RGBW) provide better color reproduction
- Adhesive backing: 3M adhesive or similar high-quality tape for secure mounting
- Cut points: Ability to trim strips to exact length without damaging functionality
- App integration: Compatibility with your smart home ecosystem
Top Smart Light Strip Options
Philips Hue Play Gradient Lightstrip: Premium option with zone control and excellent color accuracy. Works with Hue Sync Box for screen synchronization. Price: $250-300 for 65-inch version.
Govee Immersion TV Light Strip: Budget-friendly alternative with camera-based screen sync. Includes ambient light sensor for automatic brightness adjustment. Price: $70-100 depending on TV size.
LIFX Z LED Strip: Wi-Fi connected strip with excellent color quality and no hub required. Individual zone control for complex effects. Price: $90-130.
Nanoleaf Essentials Lightstrip: Thread-enabled strip with fast response times and Matter support for future-proofing. Price: $50-80.
Installation Step-by-Step
Step 1: Prepare Your TV and Workspace
Turn off and unplug your TV. Clean the back surface thoroughly with isopropyl alcohol to remove dust and oils. Allow it to dry completely. Position your TV so you can comfortably access all edges where you plan to mount the strip.
Locate your TV’s infrared sensor, usually at the bottom center. Avoid placing LED strips directly in front of this sensor, as bright lights can interfere with remote control signals.
Step 2: Plan Your Strip Placement
Standard placement covers three sides: top, left, and right. Leave the bottom edge clear to avoid:
- Blocking HDMI ports and power inputs
- Interfering with soundbar placement
- Obstructing IR sensors and TV stands
- Creating distracting floor reflections
Place the strip 2-3 inches from the visible edge of the TV for optimal light distribution. This distance prevents individual LEDs from creating spotty light patterns on your wall.
Step 3: Test the Strip Before Mounting
Connect the LED strip to power and test all functions through the app. Verify:
- All LED segments light up properly
- Colors display correctly
- App connectivity works reliably
- All zones or segments are programmable
Testing before installation prevents discovering defects after mounting adhesive strips that are difficult to reposition.
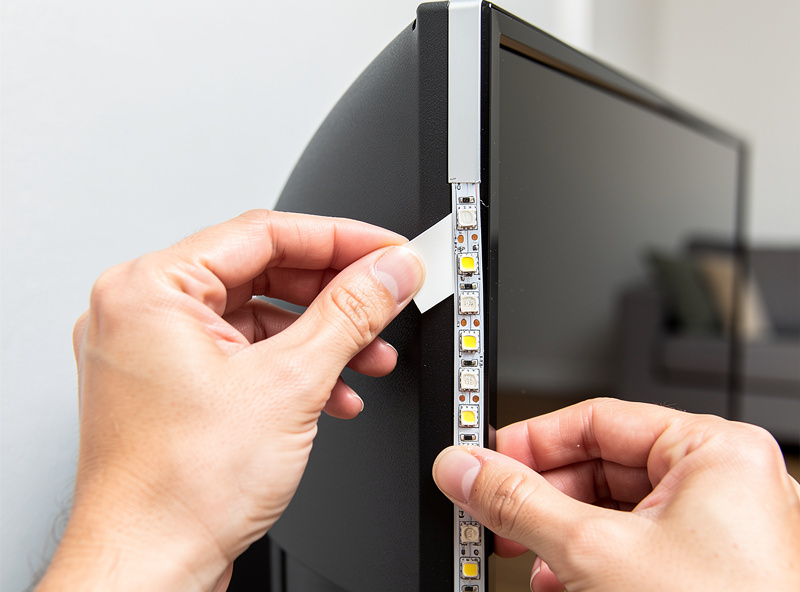
Step 4: Mount the LED Strip
Start at one corner and work your way around. Peel back the adhesive backing gradually rather than removing it all at once. This prevents the strip from sticking to itself or surfaces prematurely.
For best results:
- Apply gentle pressure along the entire length as you mount
- Work in sections to maintain straight lines
- Use corner clips or mounting brackets at 90-degree turns
- Cut only at designated cut points marked on the strip
If your TV back has vents or irregular surfaces, use cable clips or adhesive cable mounts to bridge gaps while keeping the strip level.
Step 5: Secure Cables and Power Supply
Route power cables down the TV stand or through cable management channels. Secure loose cables with cable ties or adhesive clips. Position the power adapter where it receives adequate ventilation and remains accessible for troubleshooting.
For a cleaner installation, consider:
- Using a USB power adapter plugged into your TV’s USB port (if supported)
- Installing a cable raceway along your TV stand
- Routing power through wall-mounted cable covers
App Configuration and Setup
Initial App Setup
Download your light strip manufacturer’s app and create an account. Follow the pairing instructions to connect your strip to Wi-Fi. Most apps guide you through:
- Creating a room or zone for your TV lights
- Naming the device descriptively (e.g., “Living Room TV Backlight”)
- Connecting to your home Wi-Fi network (usually 2.4GHz)
- Testing basic on/off and color functions
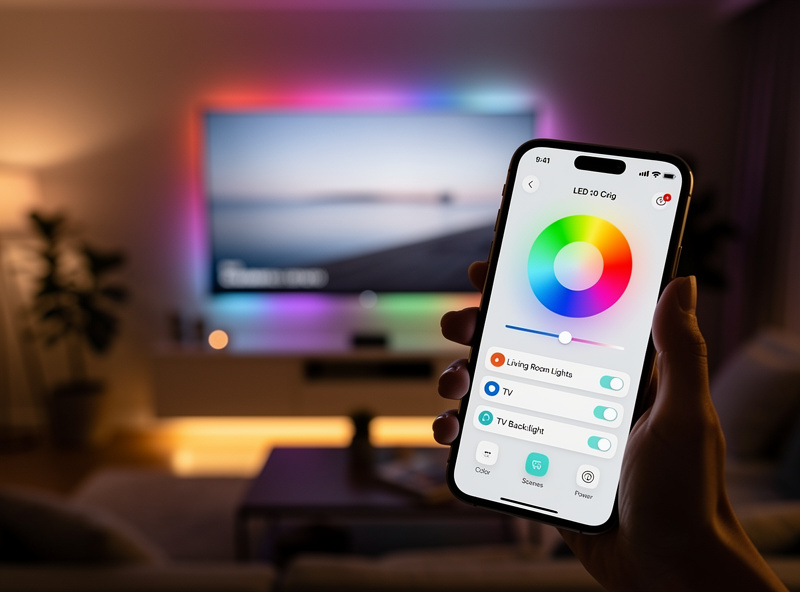
Configuring Screen Sync Features
Advanced light strips like the Govee Immersion or Philips Hue Gradient use cameras or HDMI pass-through to sync colors with your screen. Setup typically involves:
For camera-based systems (Govee):
- Mount the included camera on top or bottom of your TV
- Calibrate the camera view to match your screen edges in the app
- Adjust sensitivity settings to prevent flickering or delayed responses
- Enable automatic mode switching for movies vs. gaming
For HDMI-based systems (Philips Hue Sync Box):
- Connect your streaming devices and gaming consoles through the Sync Box
- Configure input switching in the Hue Sync app
- Set intensity levels for different content types (subtle for movies, vibrant for gaming)
- Enable automatic start/stop with TV power
Creating Static Scenes
Not all viewing requires screen synchronization. Configure static scenes for different activities:
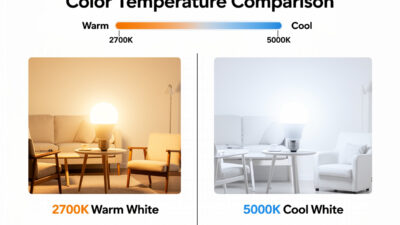
- Warm white (2700K): Comfortable viewing for news and talk shows
- Cool white (5000K): Better for sports and bright content
- Dim red/orange: Late-night viewing that preserves night vision
- Purple/blue accent: Gaming atmosphere or movie nights
Save these scenes in your app for quick access through the interface or voice commands.
Integration with Smart Home Systems
Connect your TV backlight to broader automation routines:
- Movie time scene: Dim main lights, activate TV backlight, close smart blinds
- Gaming mode: Set vibrant colors, reduce ambient room lighting
- Goodnight routine: Automatically turn off TV backlight after a set time
- Voice control: “Alexa, set TV lights to movie mode”
Most smart light strips work with Amazon Alexa, Google Assistant, and increasingly with Apple HomeKit through Matter support. Configure these in your respective smart home apps after initial setup.
Troubleshooting Common Issues
LEDs Not Sticking to TV
If adhesive fails, clean the surface again with alcohol and ensure it’s completely dry. Consider using additional adhesive like double-sided mounting tape or small adhesive cable clips spaced every 6-12 inches.
Uneven Lighting or Dark Spots
If the glow on your wall looks patchy — bright hot spots near the strip edges fading to dim shadows in between — move the strip further from the TV edge. At 3-4 inches instead of 2, the individual LED cones blend into a single smooth wash of light. Ensure all LEDs face the wall, not angled sideways. A strip bent sharply at a corner will kink and block light output — use corner clips to maintain a gentle curve instead.
Screen Sync Lag or Inaccuracy
For camera systems, recalibrate and ensure adequate ambient lighting for the camera to distinguish screen edges. Reduce sync intensity settings if colors feel overwhelming or inaccurate. Update firmware through the app regularly.
Wi-Fi Connectivity Drops
Ensure your TV backlight stays within strong Wi-Fi range. If your TV area has weak signal, consider a Wi-Fi extender or mesh node nearby. Most light strips require 2.4GHz networks, which offer better range than 5GHz.
FAQ
How long do LED light strips last behind a TV?
Quality LED strips last 30,000-50,000 hours, roughly 10-15 years of daily use at 8 hours per day. Cheaper strips may dim or develop dead sections within 1-2 years. Brands like Philips Hue and Govee offer strips rated for the higher end of this range.
Do TV light strips reduce eye strain?
Yes. Bias lighting behind your TV reduces the contrast between the bright screen and dark room, decreasing eye fatigue during extended viewing. The specific target comes from SMPTE’s broadcast-monitoring recommended practice (RP 166): bias lighting at 6,500K color temperature and roughly 10 percent of screen peak brightness.
Can I cut LED light strips to fit my TV?
Most LED strips have marked cut points every 2-4 inches where you can safely trim them with scissors. Only cut at designated marks to avoid damaging the circuit. Some strips like Philips Hue can only be cut but not reconnected, while others include connectors for extending or rejoining.
What color should TV backlighting be?
Cool white (6,500K) is recommended for accurate color perception during movies and gaming. Warm white (2,700-3,000K) creates a more relaxed atmosphere. Avoid colored backlighting during color-critical viewing as it distorts on-screen colors.
Do smart light strips work with HDMI sync boxes?
Yes. Philips Hue Play HDMI Sync Box and Govee DreamView match strip colors to on-screen content in real-time. These require compatible light strips and add $50-250 to your setup but create an immersive ambient lighting effect that extends the screen visually.
How much electricity do TV light strips use?
A typical 2-meter LED strip behind a TV draws 5-15 watts, costing roughly $1-3 per year at average electricity rates running 4 hours daily. This is negligible compared to the TV itself, which draws 50-200 watts depending on size and technology.
Bottom Line
Installing a smart light strip behind your TV requires measuring your TV size, selecting an appropriately sized kit, cleaning and preparing the mounting surface, and carefully applying the strip around three edges while leaving the bottom clear. App configuration connects your lights to Wi-Fi and enables screen synchronization or static bias lighting based on your preferences.
Expect to spend $70-300 depending on features and TV size. Installation takes 30-45 minutes for most setups. The benefits include reduced eye strain, enhanced perceived contrast, and immersive viewing experiences that transform how you enjoy movies, gaming, and streaming content.
Looking for other ways to enhance your entertainment space? Explore the best smart home devices for 2026 to complete your connected home theater setup.
Related Articles
- Best Smart Lights 2026: Complete Buyer Guide
- Smart Bulb Color Temperature Explained
- Best Smart Lights Without a Hub
- Best Smart Lights for Apartment Renters
- Smart Bulb vs Smart Switch: Complete Comparison