Automated Nutrient Dosing: Peristaltic Pumps, Float Switches, and Home Assistant Logic
Three peristaltic pumps, two float switches, one Zigbee smart plug, and a single Home Assistant automation — that is all the hardware needed to dose a hydroponic reservoir automatically. The automation checks the float switch state every four hours, runs a peristaltic pump for a calibrated duration to top off with water or nutrient concentrate, and logs the dosing event to a spreadsheet in the dashboard. Total hardware cost: under $80. The time saved: roughly 15 minutes per day of manual measuring, mixing, and pouring that adds up to 90 hours per growing season.
The hobbyist side — the person with two DWC buckets and a Home Assistant instance already running the grow lights — gets ignored because the assumption is that automation is too complex for a 4-bucket setup. It is not.
Most automated nutrient dosing guides are written for commercial greenhouse operators running industrial-scale injection systems that cost thousands. The hobbyist side — the person with two DWC buckets and a Home Assistant instance already running the grow lights — gets ignored because the assumption is that automation is too complex for a 4-bucket setup. It is not. A peristaltic pump costs $15 to $25, moves fluid at 10 to 100 milliliters per minute with enough precision to dose within 5 percent of target, and draws less than 15 watts under load. A smart plug can switch it on and off with millisecond timing resolution when connected over Zigbee. The gap between “I check my EC manually every morning” and “my reservoir doses itself” is two pumps, a smart plug, and forty lines of Home Assistant YAML.
The Hardware: Peristaltic Pumps, Float Switches, and Smart Plugs
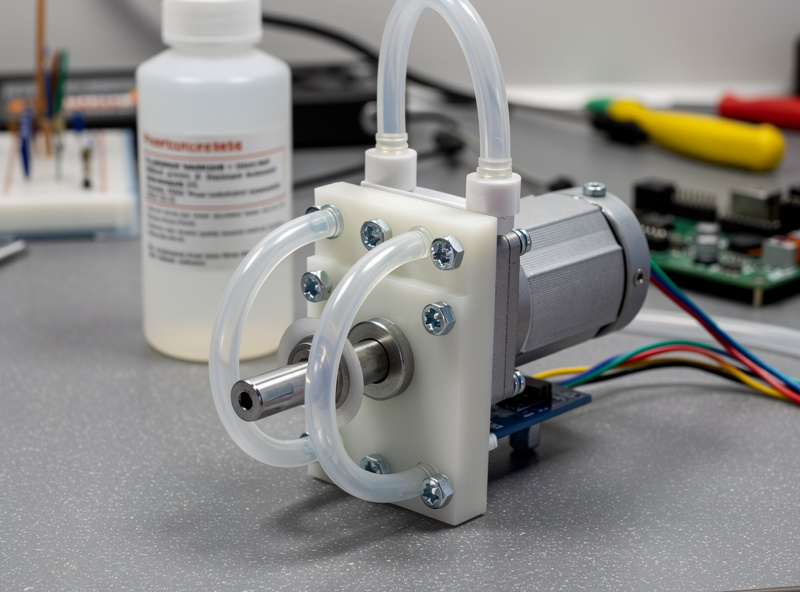
A peristaltic pump squeezes flexible tubing with a rotating roller, moving liquid in precise, sealed increments without any part of the pump contacting the fluid. This matters for nutrient dosing because the pump never clogs with precipitated mineral salts, never introduces contamination, and delivers the same volume per motor revolution regardless of the viscosity of the solution being moved. A 12-volt DC peristaltic pump rated at 60 milliliters per minute costs $15 to $20, runs off a 12-volt wall adapter switched by the smart plug, and will dose 10 milliliters of pH-down solution in exactly 10 seconds of runtime. Calibrate once — measure output for 60 seconds into a graduated cylinder — and the number stays consistent across months of use.
The first version of my dosing automation had no high-level cutoff — the water pump ran until the float switch reported closed, which it never did because the switch was installed upside down. I flooded the grow tent floor with 8 liters of nutrient solution before I noticed. Float switches handle the water-level sensing side. A simple vertical float switch — a reed switch inside a sealed stem with a magnetic float ring that rises and falls with the water level — closes or opens a circuit when the water drops below a set point. Wire it to a door/window sensor by soldering the float switch leads to the reed-switch terminals on the sensor PCB, and the float-switch state appears in Home Assistant as a binary sensor. Water level drops, float falls, sensor reports “open,” automation triggers the top-off pump. The whole circuit costs $8 for the float switch and $12 for a basic Zigbee contact sensor, no soldering beyond two wires. This is the same contact-sensor logic that reports whether a door is open or closed — Home Assistant does not care that the “door” is a water level.
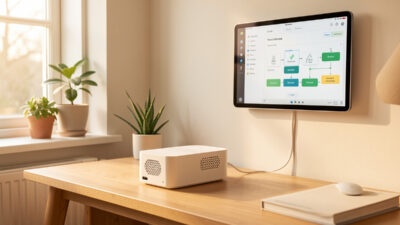
Wiring the System into Home Assistant
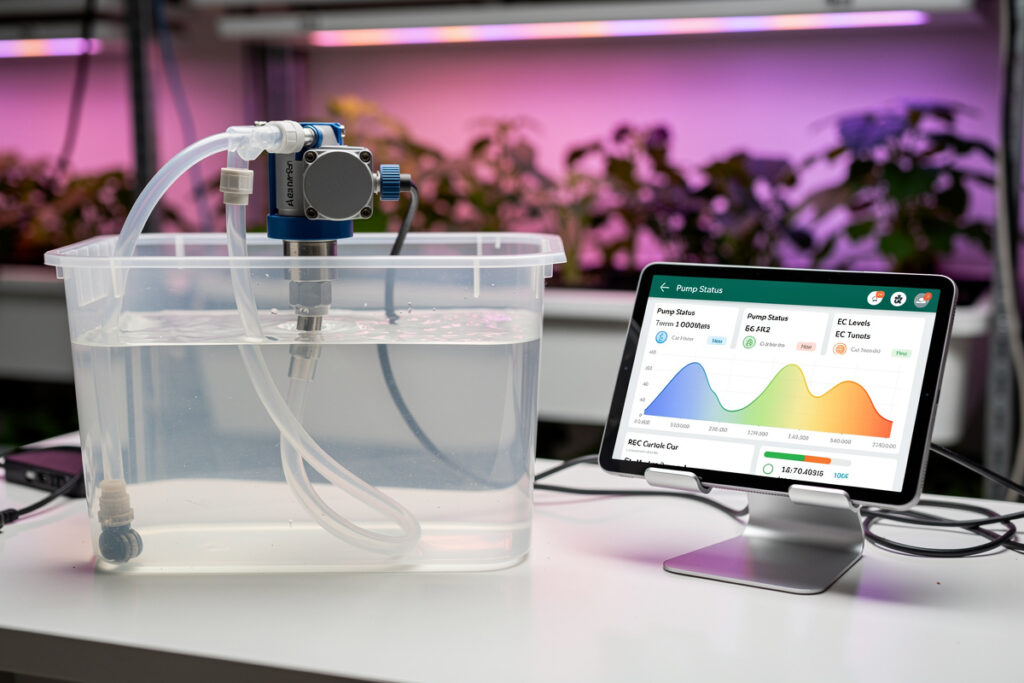
Peristaltic pump dosing accuracy holds within 3 to 5 percent of calibrated volume across fluid viscosities from water to concentrated nutrient solution, per the pump manufacturer’s published flow curves — the same precision that makes these pumps standard in medical IV infusion. Home Assistant sees everything as an entity — a smart plug is a switch entity, a contact sensor is a binary-sensor entity, an automation is a collection of triggers, conditions, and actions. The nutrient dosing system uses three switch entities (three smart plugs controlling three peristaltic pumps — water top-off, nutrient A, and pH-down) and two binary-sensor entities (two float switches — one for low-water-level alarm, one for high-water-level cutoff). The water top-off pump runs on a schedule: every four hours, if the low-level float reports “open,” run the water pump for 90 seconds (delivering roughly 90 milliliters at a calibrated 60 mL/min flow rate through a T-connector that splits the flow between two buckets).
The nutrient and pH pumps run on a slower schedule — once every 24 hours is sufficient for most DWC setups because nutrient concentration does not drift fast enough to need correction every four hours. The automation reads the EC and pH sensors first (Bluelab or similar meters with data-logging outputs), compares the reading to the target range, and triggers the dose pump for a calculated duration based on the EC drift since the last dosing event. If EC dropped from 1.8 to 1.4 mS/cm across 24 hours, the automation runs the nutrient pump for a duration that adds enough concentrate to bring the reservoir back to 1.8. The math is straightforward: know your pump’s milliliters-per-minute, know your nutrient solution’s EC per milliliter in your specific reservoir volume, and calculate the seconds of runtime needed. Once calibrated, the system runs itself for weeks between reservoir changes. For the full breakdown of what goes into the nutrient solution and how the different components interact, the hydroponic nutrients guide covers the complete formulation logic — the automation is only as smart as the recipe it is dosing.
Writing the Home Assistant Automations
The automations live in Home Assistant’s YAML configuration or the visual automation editor. The water-top-off automation is a time-pattern trigger combined with a state condition: trigger every four hours, but only execute if the low-water float sensor is in the “open” state. The action turns on the water-pump smart plug for 90 seconds, waits for the pump to finish, then checks the float state again. If the float still reports “open” after the top-off cycle, the automation sends a notification — the reservoir might be empty, the pump tubing might have come loose, or the float might be stuck.

The nutrient dosing automation is a conditional time trigger combined with a numeric-state trigger on the EC sensor: run once per day at a set time, but skip if EC is already within the target range. If EC is below target, calculate the pump runtime by multiplying the required EC increase by a calibration factor (milliseconds of pump runtime per 0.1 mS/cm of EC rise in your specific reservoir). This is where the initial calibration pays for itself — measure once, and the automation gets it right every time. If EC is above target, the automation runs the water pump for a longer top-off to dilute rather than dosing more nutrient. If EC has not changed at all across 48 hours, the automation flags an alert: either the nutrient pump is not delivering, the plants have stopped feeding (possible root problem), or the EC sensor has drifted out of calibration. Silent failure is worse than no automation at all — a system that reports “everything is fine” while the plants starve is worse than one that announces it needs attention.
The same logic from smart-plug automations applies here: the smart plug fundamentals are the same whether the plug is controlling a lamp, a grow light, or a dosing pump. The entity in Home Assistant is interchangeable — only the schedule and the safety conditions change from application to application.
Safety Layers: What Prevents a Dosing Accident
The failure mode that scares people away from automated nutrient dosing is the stuck-on pump — the smart plug fails to turn off, the peristaltic pump runs until the nutrient concentrate bottle is empty, and the reservoir floods with six months’ worth of fertilizer in 20 minutes. Two independent safety layers prevent this without adding meaningful cost.
Layer one is the high-level float switch. Mounted near the top of the reservoir, it triggers a hard cutoff that forces the pump smart plug to the “off” state in Home Assistant when the water level crosses the high threshold. This is a software cutoff, not a hardware one — if Home Assistant’s Zigbee coordinator is down, the cutoff does not fire. That is what layer two handles: a physical float valve on the water supply line that closes mechanically when the reservoir fills to a certain height, same principle as a toilet fill valve. The pump keeps running, but the flow has nowhere to go, and the peristaltic pump’s tubing pops off the barb fitting under pressure — messy but not catastrophic. A $6 inline flow restrictor between the pump and the reservoir also limits the maximum flow rate so even a fully stuck-on pump cannot deliver more than a trickle.
Maintaining the Automated Dosing System
The system reduces daily labor but introduces a new maintenance schedule: calibrate the pumps every 30 days by measuring output volume into a graduated cylinder for 60 seconds and adjusting the automation’s runtime multiplier if the flow rate has drifted. Clean the float switches every two weeks — biofilm and mineral scale build up on the float stem and cause the magnetic ring to stick, returning a false “closed” signal that tells the automation the water level is fine when it is not. Replace the peristaltic pump tubing every three to six months — the silicone or Tygon tubing inside the pump head loses elasticity with repeated compression cycles and starts delivering inconsistent volumes per revolution.
The automation logs every dosing event to a CSV file through Home Assistant’s file integration or an InfluxDB database: timestamp, pump name, runtime in seconds, EC before dosing, EC after dosing, water level before top-off. Reviewing the log once a week reveals the system’s behavior over time — EC trending upward despite stable dosing means the plants are drinking more water than nutrients (common in high-temperature weeks). EC trending downward means the opposite. The log turns the automation from a black box into a transparent record, and transparency is what makes an automated system trustworthy. For the complete nutrient strategy that the automation is executing — what to put in the bottles, at what concentration, and how the different feeding schedules change across the plant’s life cycle — the hydroponic nutrients resource covers the formulation side.
As an Amazon Associate I earn from qualifying purchases.
Frequently Asked Questions
How much does an automated nutrient dosing system cost?
A basic three-pump system with smart plugs, float switches, and tubing costs $70 to $90 total. This covers three peristaltic pumps at $15 each, two Zigbee smart plugs at $12 each, two float switches at $8 each, and silicone tubing. pH and EC sensors add $40 to $120 depending on brand.
Do I need a separate smart plug for each pump?
Yes. Each peristaltic pump needs its own smart plug because the pumps run on different schedules — water top-off runs every few hours while nutrient dosing runs once daily. A single smart plug controlling all pumps cannot dose nutrients independently of topping off water.
What happens if the Wi-Fi goes down during a dosing cycle?
Most Zigbee smart plugs retain their last state during a coordinator outage — if the plug was off, it stays off. A pump that was mid-dose when the network drops will complete its cycle on the plug’s internal timer (if supported) or stop immediately. The high-level float switch provides a physical backup cutoff independent of the network.
Can I use this system with a Kratky setup instead of DWC?
Not effectively. Kratky systems are passive by design — the air gap between the net pot and the water surface is the oxygenation mechanism. Automated top-off eliminates that air gap and drowns the roots. DWC, NFT, and ebb-and-flow systems work with automated dosing; Kratky should remain manual.
How often should I recalibrate the peristaltic pumps?
Every 30 days during active growing. Measure pump output for 60 seconds into a graduated cylinder and update the automation’s runtime multiplier. Tubing elasticity degrades gradually and flow rates drift by 5 to 10 percent per month if unchecked. At the start of a new grow cycle, recalibrate all pumps.
Is automated dosing worth it for a two-bucket DWC setup?
Yes, if you travel or want consistency. Two buckets require roughly 10 minutes of manual measuring and dosing per day — 60 hours per year. The $80 system pays for itself in saved time within the first growing season and eliminates the inconsistency of hand-mixing nutrients that causes EC spikes and plant stress.
Related Articles
- Best Smart Plugs 2026: Complete Buyer Guide
- Smart Plug Explained: How They Work, Setup, and Troubleshooting
- Smart Plug vs Smart Switch: Which Should You Choose?
- Are Smart Plugs Worth It? Complete Value Analysis
- Best Smart Plugs for Alexa 2026: Top 5 Picks