Zigbee2MQTT Setup Guide: Running a Zigbee Network That Stays Up
A Zigbee2MQTT setup guide that holds up in real life comes down to four things: a decent coordinator on a USB extension cable, a quiet radio channel, enough mains-powered routers to carry the mesh, and sensible reporting settings. Get those right and a 60-device network runs for years untouched. In my setup, Zigbee2MQTT has been the backbone of the house for longer than most cloud apps I started with even still exist.
This is the hub page for everything I run day to day on Zigbee — the operational layer that sits underneath the pretty dashboards. I run Home Assistant on a small Intel N100 box, with Zigbee2MQTT talking to a dedicated coordinator stick, and MQTT as the message bus tying it all together. Below I will walk through the whole thing the way I would set it up again from scratch, then point you to the deeper guides for each piece. If you are still deciding between radios, start with my comparison of Zigbee vs Z-Wave vs Wi-Fi and Wi-Fi vs Zigbee for smart home devices first — this guide assumes you have already decided Zigbee is the mesh you want to run well.
Why I run Zigbee2MQTT instead of a cloud hub
Zigbee2MQTT turns a cheap USB coordinator into a fully local Zigbee gateway that publishes every device to an MQTT broker. Nothing leaves the house, nothing depends on a vendor staying in business, and the automations keep firing when the internet is down. That last point is the whole reason I bother — a smart home that breaks during an outage is just an expensive set of light switches.
The alternative most people land on is a manufacturer hub: a branded bridge that pairs the same Zigbee bulbs and sensors but routes control through that company’s cloud and app. It works, right up until the company sunsets the product, changes the terms, or has a quiet server problem three time zones away. I have watched enough of that pattern to stop trusting any core automation to a service I cannot reboot myself. With Zigbee2MQTT the coordinator is mine, the database of paired devices is a file on my SSD, and the broker is a container I control.
The other quiet advantage is breadth. Manufacturer hubs only talk to devices they have blessed. Zigbee2MQTT supports thousands of devices from dozens of brands because the community maintains the device definitions, so I can mix a Danish contact sensor, a Chinese mmWave presence sensor, and an in-wall relay on one mesh without three separate apps. If you are weighing whether you even need a hub at all, I worked through that in do you need a smart home hub — for a Zigbee mesh of any size, the answer is yes, and a local one.
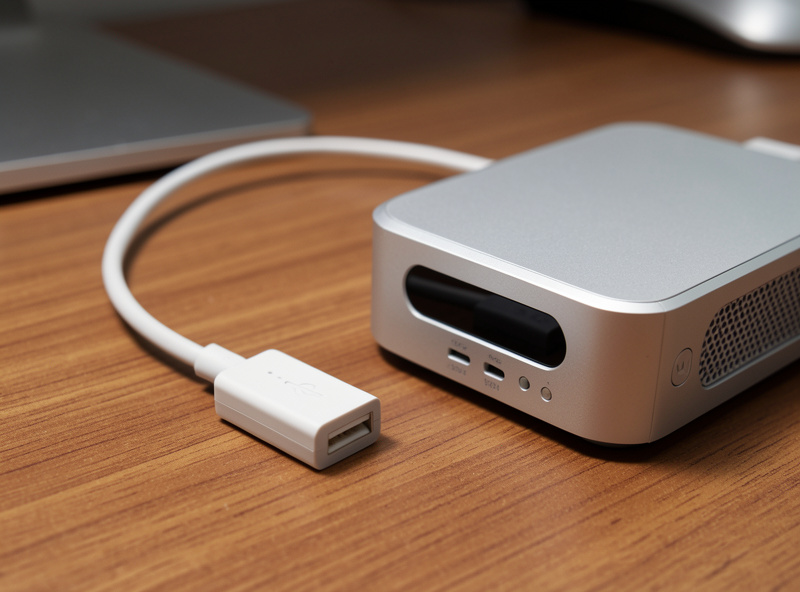
The hardware you actually need
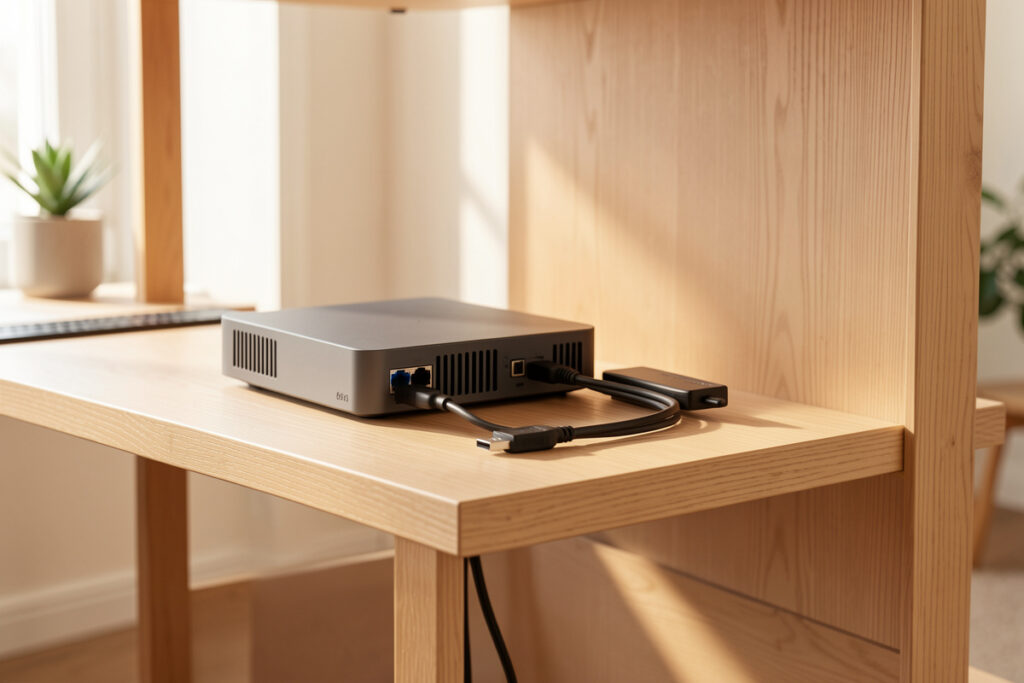
The shopping list is short and cheap relative to the devices it controls. You need a host to run Home Assistant and the broker, a Zigbee coordinator stick, and crucially a short USB extension cable. That cable is not optional padding — plugging a 2.4 GHz radio directly into a USB 3.0 port is the single most common reason new networks are flaky, because USB 3 leaks broadband noise right across the Zigbee band. I cover the why in detail in the best Zigbee coordinator sticks guide, including the USB-3 trap that quietly wrecks range.
For the host, I run HA OS on a fanless N100 mini-PC with an SSD rather than a Raspberry Pi on an SD card. The Pi is a perfectly good starting point and I have written a full Home Assistant on a Raspberry Pi setup, but once a network grows past a few dozen devices the SD card wear and the reboot anxiety stop being worth the saving. The coordinator itself is a SLZB-class Ethernet/USB device or a Sonoff-class USB stick — both run the same firmware families and both are fine. What matters far more than the brand is where you physically put it.
| Component | What I run | Budget option | Why it matters |
|---|---|---|---|
| Host | Intel N100 mini-PC + SSD | Raspberry Pi 4 + good SD/SSD | Stability and headroom for add-ons |
| Coordinator | SLZB-class PoE/USB or Sonoff stick | Sonoff USB dongle | Modern chipset, OTA-capable firmware |
| USB extension | Short USB 2.0 extension cable | Same — non-negotiable | Moves the radio away from USB-3 and case noise |
| Broker | Mosquitto MQTT add-on | Mosquitto add-on | Local message bus, no cloud |
| Routers | Mains-powered plugs/relays | Any always-on Zigbee plug | They carry and heal the mesh |
If you only take one purchasing decision from this page: spend on the coordinator and a couple of mains-powered routers, not on premium bulbs. The coordinator is the heart, and the routers are the circulatory system. Everything else is a sensor or an actuator hanging off that. I keep a couple of energy-reporting smart plugs in the network specifically because they double as silent repeaters — the same hardware I recommend in best smart plugs does two jobs at once.
As an Amazon Associate I earn from qualifying purchases. When I need a coordinator I search for a Sonoff Zigbee 3.0 USB coordinator and a plain short USB 2.0 extension cable to go with it — the two belong in the same basket.
Installing Zigbee2MQTT: the path I use
If you run Home Assistant OS, the cleanest install is the Zigbee2MQTT add-on plus the Mosquitto broker add-on. You install Mosquitto first, create a dedicated MQTT user, then install Zigbee2MQTT and point it at the broker and at your coordinator’s serial port. The whole thing takes about twenty minutes the first time and five minutes every time after, because the configuration is just a YAML file you can back up and restore.
The order matters. Start the broker, confirm it is listening, then start Zigbee2MQTT and watch the log until it reports the coordinator firmware version and “Zigbee2MQTT started.” If the log loops on “failed to connect to the adapter,” nine times out of ten it is the wrong serial path or a USB-3 port problem, not a broken stick. Get a clean start with zero devices before you pair anything — a network that is already misbehaving with one device will only get harder to read once forty are on it.
Once it is running, Zigbee2MQTT exposes a web frontend with a live map of your mesh. That map becomes your most useful diagnostic tool, and I will come back to it. For DIY nodes I add later, I run ESPHome devices that publish over the same MQTT bus — if you want to build your own sensors rather than buy them, my ESP32 and ESPHome DIY sensors guide pairs naturally with this stack.
Pairing devices without poisoning the mesh
Pairing looks trivial — hit “permit join,” reset the device, wait for it to appear — but the order you do it in shapes how healthy the mesh ends up. The rule I follow is simple: pair your mains-powered routers first and in their final location, then pair battery devices afterward. A battery sensor joins by talking to whatever router is nearest at the moment of pairing, so if you pair it sitting next to the coordinator and then move it to the garage, it will keep trying to reach the parent it first bonded with and drop off.
So I energize the smart plugs and relays where they will actually live, let the mesh settle for a few minutes, and only then pair the battery sensors in or near their final spots. If a device refuses to join, the fix is rarely “permit join harder” — it is usually distance to the nearest router or a stale pairing on the device. I keep a full diagnostic order in smart device won’t pair with your hub, and it applies directly here.
One more habit: name the device the moment it joins, before you pair the next one. Forty devices called “0x00158d000… lumi.sensor” is how you lose an afternoon later. I name by room and function — “kitchen_motion,” “garage_door_contact” — and I never reuse a name. That naming discipline pays off the first time you write an automation that has to find the right entity at 2 a.m.
Entity naming: tame the long tail before it tames you
This is the part nobody warns you about. A Zigbee network does not stay at ten devices — mine crept past sixty without any single moment where I decided to go big, and every device brings several entities: a motion sensor exposes motion, illuminance, battery, and link quality, so sixty devices easily becomes two or three hundred entities. If they are named inconsistently, writing or fixing an automation becomes archaeology.
The convention I settled on is room first, then function, then a qualifier only if needed: kitchen_motion, kitchen_counter_lights, livingroom_window_left_contact. Lowercase, underscores, no spaces, no device brand in the name — because the day I swap a sensor for a different brand, I want the automation to keep working without a rename. In Zigbee2MQTT you set the friendly name once at pairing and it propagates to the MQTT topic and into Home Assistant, so getting it right at join time saves you renaming the same thing in three places.
I also keep “areas” in Home Assistant aligned to physical rooms and assign every device to one. It feels like bureaucracy for the first dozen devices and then becomes the thing that lets me write one automation that targets “all lights in this area” instead of listing entities by hand. The discipline costs thirty seconds per device at pairing and saves hours over the life of the network. If you skip it, the long tail of entities quietly becomes the reason you stop adding to your smart home — it gets too annoying to extend.

Building a mesh that heals itself
A Zigbee network is only as good as its routing. Mains-powered devices — plugs, relays, most bulbs — act as routers that relay traffic and extend range. Battery devices are end devices that sleep most of the time and only talk to their parent router. A healthy mesh has routers spread through the house so every end device has a strong parent nearby; a sick mesh has all the routers clustered near the coordinator and a lonely sensor at the far end of the house clinging to a weak link.
The mental model that fixed this for me is that Zigbee range is about the path, not the straight-line distance. A sensor twelve meters away through two brick walls can be rock solid if there is a router between them, and unreliable across an open room if there is not. I dug into exactly this in Zigbee and Z-Wave range problems — it is the path, not the distance. The practical move is to scatter cheap mains routers so the mesh has options, then let it self-heal.
If you want the deeper treatment, the difference between routers and end devices and how repeaters actually carry traffic is its own guide: Zigbee routers vs end devices. And when you need to physically extend coverage into a garage or outbuilding, the right way to do it — pair the repeater in place, then re-pair the orphaned sensors through it — is in how to add a Zigbee repeater the right way. Adding a repeater and walking away rarely works, because existing devices do not migrate to it on their own.
Where to physically put the coordinator
The coordinator’s location matters as much as any setting. Buried in a media cabinet next to a router, a powerline adapter, and a stack of warm electronics, even a great stick will struggle — it is sitting in a soup of 2.4 GHz noise. The fix that works for me is a coordinator on an Ethernet/PoE connection (or a USB extension) mounted out in the open, ideally somewhere central and a foot or two clear of other gear.
This is exactly why I like the SLZB-class network coordinators over a USB stick jammed into the back of the server: I can run the coordinator on a length of Ethernet to a sensible central spot and keep the host wherever the host needs to live. The radio gets clean air, the host gets put away. If you are stuck with a USB stick, the extension cable is doing the same job in miniature — getting the antenna out of the noise. Either way, treat the coordinator like the antenna it is, not like a flash drive.
A practical test: pair a couple of routers, look at the link quality (LQI) values in the Zigbee2MQTT map, then physically move the coordinator and watch the numbers. You will see the difference in seconds. I have turned a network that dropped a sensor a day into a rock-solid one purely by moving the coordinator out of a cabinet and onto a shelf — no new hardware, just better placement.
Channel selection and living next to Wi-Fi
Zigbee and 2.4 GHz Wi-Fi share the same spectrum, and that is where most “my sensors randomly drop” complaints actually come from. Zigbee has 16 channels in the 2.4 GHz band, and several of them sit directly underneath the busiest Wi-Fi channels. If your coordinator landed on a channel that overlaps your router’s Wi-Fi, you will get intermittent dropouts that look like dying devices but are really collisions.
I pick a Zigbee channel that sits in the gap between Wi-Fi channels — the practical safe choices are the ones that avoid the heavily used Wi-Fi 1, 6, and 11 territory. Changing channel is not free, though: it means re-pairing devices, so it is a decision to make early and rarely. The full walkthrough of which channel to choose, how to see what your Wi-Fi is using, and when it is worth the re-pair is in Zigbee channel vs Wi-Fi interference.
This is also where network hygiene on the Wi-Fi side helps the Zigbee side. Putting your chatty IoT gear on its own VLAN does not change the radio physics, but a cleaner, better-planned 2.4 GHz environment with fewer rogue access points means less for Zigbee to dodge. I run IoT on a separate segment for security reasons anyway — see smart home VLAN setup and a separate Wi-Fi network for IoT — and the radio calm is a welcome side effect. If your wider Wi-Fi is a mess, my smart home Wi-Fi guide is the place to start.
Binding, groups, and cutting out latency
Once the mesh is solid, the next level of operations is making control feel instant. By default, pressing a Zigbee wall switch sends a message up to the coordinator, into Home Assistant, through an automation, and back down to the bulb — the “hub hop.” It works, but there is a perceptible lag, and it breaks entirely if the hub is rebooting. Zigbee binding lets a switch talk directly to a bulb or group at the radio level, so the light responds even with the hub offline.
Groups let you control many devices with one command instead of firing ten separate messages that congest the mesh. Together, binding and groups are how you get a switch-to-bulb response that feels like a dumb light switch while keeping all the smarts. It is genuinely one of the most satisfying upgrades on a mature network, and I wrote the whole how-to in Zigbee binding and groups — switch-to-bulb control without the hub hop.
Keeping it healthy: monitoring, reporting, and batteries
A network you never look at is a network that fails silently. The two things I watch are the Zigbee2MQTT map for link quality and the battery levels of every sleepy device. Most “dead” sensors are not broken — they have lost their parent router, or their reporting interval is hammering the battery flat. When a device starts misbehaving, I have a fixed order I work through so I am not guessing; that order lives in Zigbee device keeps dropping off the mesh.
Battery life on Zigbee sensors should be measured in many months to years, not weeks. When a contact sensor is eating a coin cell every few weeks, the culprit is almost always an aggressive reporting configuration or a marginal mesh link forcing constant retries, not a bad battery. Tuning how often a device reports — and fixing the mesh path it depends on — is the real fix, and I lay it out in why your Zigbee sensor batteries die fast. Good sensors are the engine of a smart home; if you are still building out your sensor coverage, my best smart home sensors guide covers what to buy.
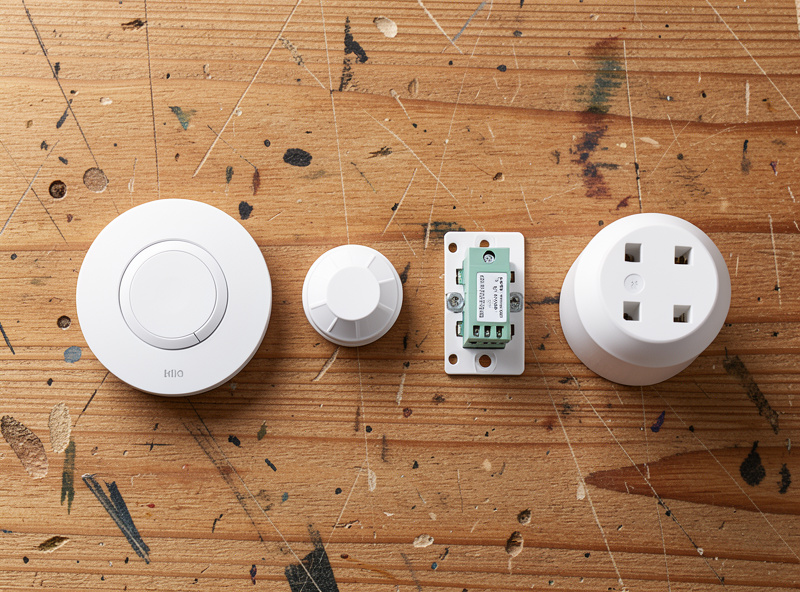
Two more maintenance habits worth building. First, back up the Zigbee2MQTT data directory regularly — it holds the network key and the paired-device database, and losing it means re-pairing everything. Second, do OTA firmware updates deliberately, one device at a time, on a quiet network, never in a batch while you are out. A modern coordinator and current firmware fix a surprising number of “haunted house” quirks, but a firmware update mid-automation is its own kind of trouble.
Zigbee2MQTT vs the two alternatives, at a glance
People usually arrive here choosing between three ways to run Zigbee in Home Assistant: Zigbee2MQTT, the built-in ZHA integration, or a manufacturer cloud hub. I run Zigbee2MQTT, but ZHA is a legitimate choice and the right one for some setups — I compare them properly in Zigbee2MQTT vs ZHA. The short version is below.
| Factor | Zigbee2MQTT | ZHA (built-in) | Manufacturer cloud hub |
|---|---|---|---|
| Local control | Full local | Full local | Cloud-dependent |
| Device support | Widest, community-maintained | Broad, growing | Brand-locked |
| Setup complexity | Moderate (needs MQTT) | Lowest (one click) | Lowest (app) |
| Tuning & visibility | Deepest (map, OTA, per-device settings) | Good | Minimal |
| Survives an outage | Yes | Yes | Often no |
| Best for | Mixed-brand networks, tinkerers | Simple all-in-HA setups | People who want an app, not a hub |
If you want the full protocol context behind all of this — how Zigbee fits next to Z-Wave, Thread, and Matter — my complete guide to smart home protocols and the explainer on what Matter is round out the picture. Zigbee is not going anywhere, but knowing where it sits helps you decide what to buy next.
Is Zigbee still worth running with Matter arriving?
It is a fair question, and I get it a lot. Matter-over-Thread is genuinely good and I run it for newer gear through border routers — but it has not made Zigbee obsolete, and I do not expect it to for years. The installed base of cheap, reliable, battery-frugal Zigbee sensors is enormous, the device support in Zigbee2MQTT is broader than any single Matter ecosystem, and a mature Zigbee mesh is a known, debuggable quantity. Thread and Zigbee even share the same 2.4 GHz radio band, so much of what you learn here about channels and interference carries straight over.
My practical stance is to run both. Zigbee remains the workhorse for the dozens of sensors, plugs, and relays where it is cheapest and most proven; Thread/Matter gets the newer devices that ship with it. The mistake is treating it as a forced migration — ripping out a working Zigbee mesh to chase a logo helps nobody. If you want the honest breakdown of where each protocol fits, the protocols complete guide and the Matter explainer lay it out without the hype. For now, the operational skills on this page are exactly the skills a healthy multi-protocol home needs.
One rule engine for the whole house
The reason I treat Zigbee operations so seriously is that this one mesh does not just run lights. The same Home Assistant install and the same MQTT bus that handle my Zigbee sensors also drive smart plugs and relays well outside the living room: the grow-light schedule in the plant tent, the compressor in a curing chamber, the pre-heat on a sauna so it is warm by the time I get to it. Every project in the workshop that uses electricity becomes a candidate for the same rule engine, and Zigbee is the nervous system that reports state back to it.
That cross-domain reach is exactly why a flaky mesh is unacceptable to me. If a contact sensor drops off, it is not just a light that misbehaves — it is a presence-based routine, an energy-monitoring rule, maybe a safety cutoff that quietly stops working. A smart home built as “presence plus state plus automations” instead of “a pile of app-controlled gadgets” lives or dies on the reliability of the underlying network. Get the Zigbee layer boring and dependable, and everything you build on top of it inherits that dependability.
It is also why I keep the boring building blocks — plugs, relays, and sensors — on Zigbee and reserve Wi-Fi for the few devices that genuinely need bandwidth, like cameras. Dozens of chatty Wi-Fi gadgets on a flat home network is how a smart home turns flaky; a tight Zigbee mesh plus a segmented network is how it stays calm. The smart plug vs smart switch decision and the IoT network separation both feed into that same philosophy.
Mistakes I made early so you do not have to
Three things cost me real time when I was learning this. First, I plugged the coordinator straight into a USB 3.0 port and spent a week blaming “cheap sensors” for dropouts that were pure interference — the extension cable fixed it in five minutes. Second, I paired battery sensors next to the hub and then carried them to their rooms, orphaning them from the routers they had bonded to; now I always pair in place. Third, I left forty devices with cryptic auto-generated names and paid for it every time I touched an automation.
The meta-lesson is that almost everything that looks like a hardware failure on Zigbee is actually a configuration or placement problem: a noisy port, a bad channel, too few routers, an aggressive reporting interval, or a device paired in the wrong place. The hardware is usually fine. That is genuinely good news, because it means the fixes are free — they live in the deeper guides below, and none of them require buying anything except, occasionally, one more mains-powered router to fill a gap in the mesh.
The cluster: deeper guides for every piece
This page is the map. Each link below goes deep on one operational piece of running a Zigbee network well:
- Zigbee2MQTT vs ZHA — which integration I run and why.
- Best Zigbee coordinator sticks — Sonoff, SLZB, and the USB-3 trap.
- Zigbee channel vs Wi-Fi interference — pick the channel that stops dropouts.
- Zigbee routers vs end devices — how mains repeaters heal your mesh.
- Zigbee device keeps dropping off — the order I diagnose it.
- How to add a Zigbee repeater — extend range the right way.
- Zigbee binding and groups — switch-to-bulb control without the hub hop.
- Zigbee sensor battery life — why they die fast and how to fix reporting.
Frequently Asked Questions
Is Zigbee2MQTT better than ZHA?
Neither is universally better. I run Zigbee2MQTT for its widest device support, the network map, and per-device tuning, but ZHA is a one-click install with no separate MQTT broker and is the simpler choice for an all-in-Home-Assistant setup. Both are fully local and both survive an internet outage.
Do I need MQTT to use Zigbee2MQTT?
Yes. Zigbee2MQTT publishes every device to an MQTT broker, so you install Mosquitto first, create an MQTT user, then point Zigbee2MQTT and Home Assistant at the broker. On Home Assistant OS both are one-click add-ons, so it is straightforward even though it is one more piece than ZHA.
Why does my Zigbee coordinator need a USB extension cable?
Plugging the coordinator straight into a USB 3.0 port floods the 2.4 GHz band with broadband noise that cripples Zigbee range. A short USB 2.0 extension cable moves the radio a few inches away from that interference and away from the metal case, which routinely turns a flaky network into a stable one.
How many devices can one Zigbee2MQTT coordinator handle?
A modern Zigbee 3.0 coordinator comfortably runs well over a hundred devices, provided you have enough mains-powered routers spread through the house to carry the mesh. The practical limit is rarely the coordinator itself and almost always too few routers, so add plugs and relays as you scale.
Will my Zigbee network keep working if the internet goes down?
Yes, that is the main reason to run it locally. With Zigbee2MQTT the coordinator, broker, and automations all live on your own hardware, so devices and rules keep firing during an outage. Bound switches even keep controlling their bulbs if Home Assistant itself is rebooting.
Should I use smart bulbs or smart switches and plugs on Zigbee?
As a building block I favor mains-powered plugs and relays because they double as routers that heal the mesh, and smart switches where you would toggle anyway. Smart bulbs only where scene color or temperature genuinely earns it, since a switched-off bulb stops routing for everything downstream of it.